CHICKEN AND DRESSING CASSEROLE

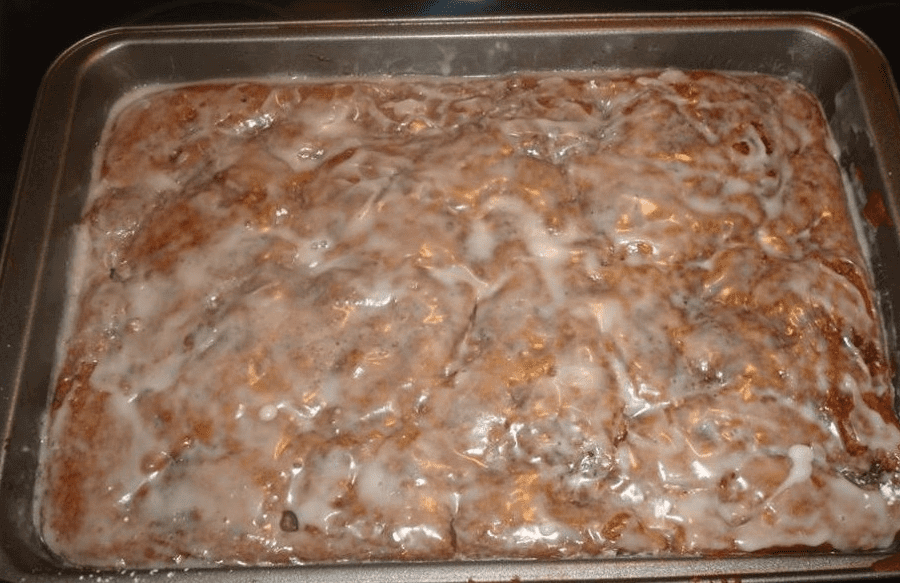
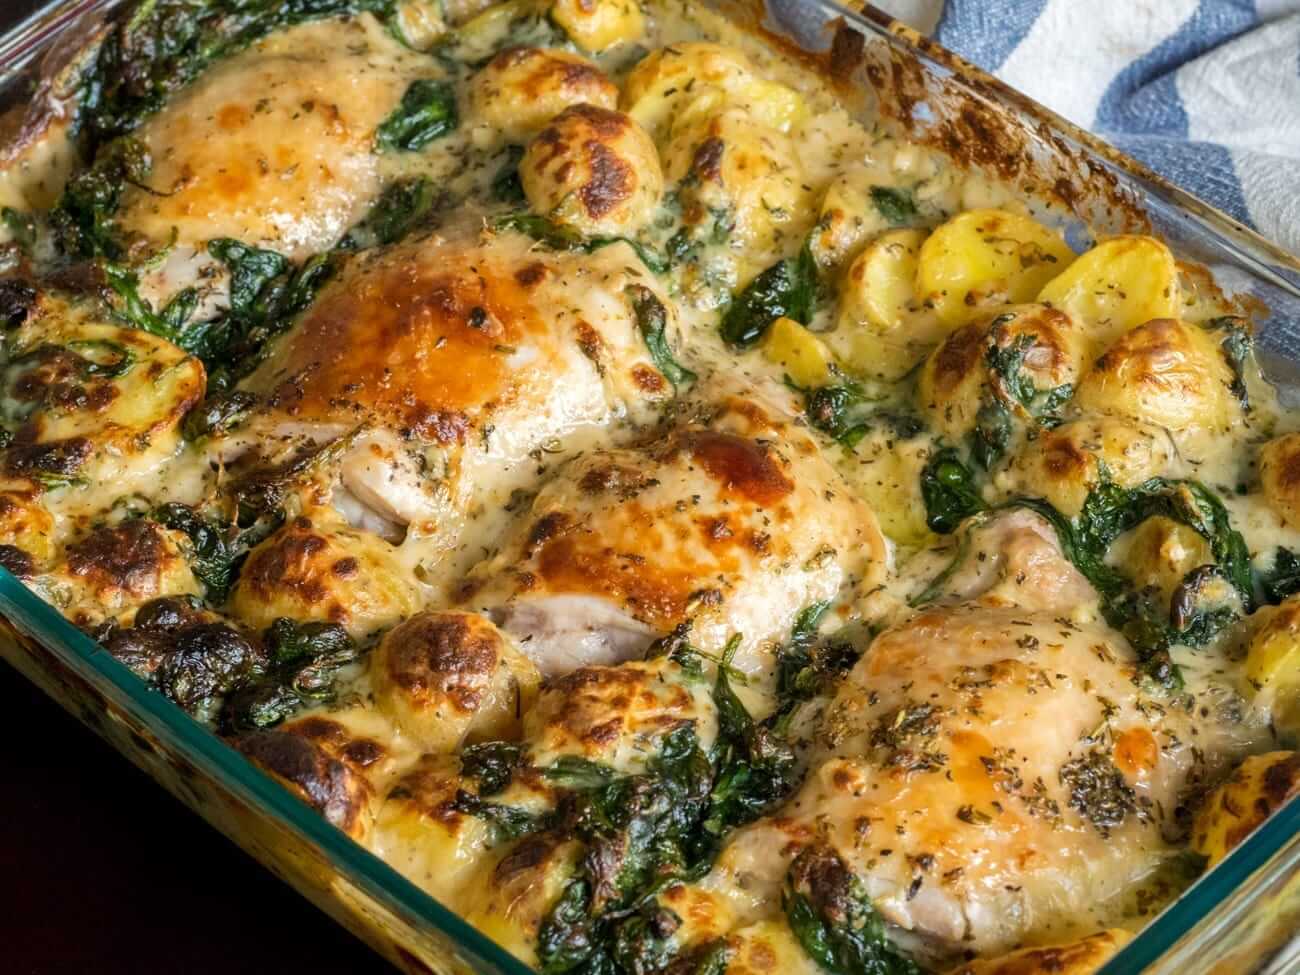
A hearty chicken and dressing casserole is truly the essence of comfort food, bringing together tender chicken, savory herbs, and a golden, crispy topping in one satisfying dish. It’s the kind of meal that wraps you in a warm hug, perfect for a family dinner or a cozy weekend. This particular version strikes that perfect balance – deeply flavorful, surprisingly simple to prepare, and utterly irresistible, making it a guaranteed crowd-pleaser that you’ll want to make again and again.

My husband, Mark, has always been a fan of classic comfort dishes, and this chicken and dressing casserole quickly rose to the top of his favorites list. I remember one particularly busy weeknight when I first threw it together, hoping for a simple meal that would also feel special. The aroma filling the kitchen was enough to draw him in, and by the time we sat down, he was practically salivating. He took his first bite, and his eyes lit up – “This is it,” he declared, “this is our new staple!” From that day on, it became a regular request, especially when the weather cools or we just need a taste of home. It’s the dish we often bring to potlucks, the one we turn to after a long day, and the one that always elicits happy sighs from around the dinner table.

Why You’ll Love This chicken-and-dressing-casserole

  • It’s the ultimate comfort food, blending tender, succulent chicken with a savory, herb-infused dressing that bakes into a delightful golden-crisp topping.
  • This dish is incredibly versatile, easily adaptable to what you have on hand, and perfect for using up leftover roasted chicken or turkey.
  • It’s a fantastic make-ahead meal, meaning you can assemble it earlier in the day (or even the day before) and simply pop it in the oven when you’re ready to eat.
  • Feeding a crowd is a breeze with this casserole; it’s hearty, satisfying, and scales up beautifully for potlucks, holidays, or larger family gatherings.
  • Minimal cleanup is a bonus! Most of the magic happens in one baking dish, reducing your after-dinner dish duty.

Behind the Recipe

What I’ve learned over countless batches of this casserole is that the magic truly lies in layering and texture. It’s easy to rush, but taking a moment to properly sauté your aromatics, like celery and onion, really builds a foundational flavor that permeates the whole dish. Another common area where people sometimes stumble is with the moisture level of the dressing. You want it moist enough to absorb all those lovely flavors and prevent it from drying out, but not so soggy that it becomes dense. A slightly crispy top is key, achieved by getting the oven temperature just right and not covering it for too long. My little secret for an extra touch of richness? A tiny drizzle of melted butter over the dressing before it bakes. It gives it that perfect golden-brown finish and deepens the flavor wonderfully.

Shopping Tips

  • Chicken: Opt for a rotisserie chicken for ultimate convenience, or pick up boneless, skinless chicken breasts or thighs to cook and shred yourself. Freshness is key for good flavor.
  • Stuffing Mix: I typically use a classic cornbread or herb-seasoned bread stuffing mix. Check the expiration date and ensure it’s not crushed to dust if using a box mix.
  • Cream Soups: Look for condensed cream of chicken or cream of mushroom soup. For a slightly richer taste, you can also find ‘hearty’ or ‘family size’ versions.
  • Chicken Broth: Choose a low-sodium chicken broth or stock so you can control the seasoning of your casserole yourself. Organic or good quality brands can make a difference.
  • Fresh Vegetables: Pick crisp celery and firm, unblemished yellow onions. These aromatics add essential depth and freshness to the casserole.
  • Herbs & Spices: A good quality poultry seasoning blend is excellent here, or you can use individual dried herbs like sage, thyme, and rosemary. Ensure your spices aren’t years old for maximum potency.

Prep Ahead Ideas

You can cook and shred your chicken up to 2-3 days in advance and store it in an airtight container in the fridge. The vegetables (celery and onion) can also be chopped a day ahead. For ultimate convenience, assemble the entire casserole, cover it tightly with foil or plastic wrap, and refrigerate for up to 24 hours before baking. Just remember to add about 10-15 minutes to the baking time if baking from cold.

Time-Saving Tricks

The quickest shortcut for this recipe is definitely using a pre-cooked rotisserie chicken. It shaves off a good 30-40 minutes of prep time. Another trick is to use pre-chopped mirepoix (celery, onion, carrots) if your grocery store offers it, though I typically stick to just celery and onion for this recipe. You can also skip sautéing the vegetables if you’re really pressed for time, but it does add a layer of flavor.

Common Mistakes

One common mistake is making the dressing too dry or too wet. If it’s too dry, the casserole will be crumbly; too wet, and it can be dense. Always add broth gradually until it’s moist but not swimming. Another pitfall is not seasoning adequately; taste your chicken mixture before assembling, as the dressing will absorb some of that flavor. Lastly, don’t overbake it to the point of dryness – a golden-brown, bubbly top is perfect, but you don’t want the chicken to dry out.

What to Serve It With

This hearty casserole pairs beautifully with simple sides that offer a contrast in texture or freshness. A crisp green salad with a light vinaigrette is always a winner, or you could go for some steamed green beans, roasted asparagus, or even a side of cranberry sauce for a touch of tart sweetness.

Tips & Mistakes

Storage Tips

Store in airtight containers in the fridge. It reheats beautifully, but if you sneak a bite cold straight from the container, it still works.

Variations and Substitutions

While the classic chicken and dressing casserole is truly wonderful, you can absolutely play around with it! Swap out chicken for leftover turkey, especially after a holiday. For a different flavor profile, try adding a pinch of smoked paprika or a dash of hot sauce to the creamy chicken layer. You can also experiment with different types of stuffing mix – a savory herb blend works just as well as cornbread. If you’re not a fan of canned cream soups, you can make your own béchamel sauce with chicken broth, milk, and flour for a fresher, homemade cream sauce base, but the classic version really does nail that nostalgic comfort.

Frequently Asked Questions

How do I prevent the dressing from becoming soggy on top?
The key is to ensure your dressing mixture isn’t overly wet before baking and to bake it uncovered for the last portion of the cooking time. If you notice it browning too quickly, tent it lightly with foil, but allow the steam to escape so the top can crisp. Using slightly less broth than directed for the dressing mix can also help, as the moisture from the chicken layer will contribute during baking.

Can I freeze chicken and dressing casserole for later?
Absolutely! This casserole freezes beautifully. Assemble it as directed but do not bake. Cover the dish tightly with a double layer of foil and freeze for up to 3 months. When ready to bake, thaw it in the refrigerator overnight, then bake as usual, adding an extra 15-20 minutes to the baking time to ensure it’s heated through.

What if I want to make it dairy-free?
You can definitely adapt this recipe to be dairy-free. Replace the condensed cream soups with a homemade dairy-free béchamel sauce made with a plant-based milk (like unsweetened almond or soy) and chicken broth. You’ll also want to use a dairy-free butter substitute for sautéing and dotting the top. Ensure your stuffing mix is also dairy-free.

My casserole tastes a bit bland, what can I do to boost the flavor?
Flavor often comes from proper seasoning and aromatics. Make sure you’re generously salting and peppering your chicken mixture, and consider adding a little extra poultry seasoning or dried sage. Sautéing your celery and onion until softened and fragrant before adding them to the chicken mixture also builds a deeper flavor base. A pinch of garlic powder or onion powder can also help.

What’s the best way to reheat individual portions of the casserole?
For individual portions, the microwave works well, usually in 1-2 minute intervals until heated through. To help keep the dressing topping from getting too soft, you can also reheat portions in a toaster oven or conventional oven at 300-325°F (150-160°C) for 10-15 minutes, covering loosely with foil if it starts to dry out.

CHICKEN AND DRESSING CASSEROLE

A comforting baked casserole combining shredded chicken with savory cornbread dressing, cream of chicken soup and vegetables for an easy family meal.
Prep Time 20 minutes
Cook Time 45 minutes
Total Time 1 hour 5 minutes
Servings 6

Ingredients
  

Main Ingredients

  • 4 cups cooked, shredded chicken
  • 10 oz cornbread stuffing mix one 10 oz box
  • 2 cups chicken broth low-sodium preferred
  • 4 tablespoons unsalted butter melted
  • 0.5 cup onion, chopped
  • 0.5 cup celery, chopped
  • 1 can cream of chicken soup 10.5 oz can
  • 1 cup milk whole or 2%
  • 1 teaspoon salt
  • 0.5 teaspoon black pepper
  • 2 tablespoons fresh parsley, chopped optional

Instructions
 

Preparation Steps

  • Preheat the oven to 350°F (175°C). Grease a 9x13 inch baking dish with butter or nonstick spray.
  • In a large bowl, combine the cornbread stuffing mix and melted butter. Slowly add the chicken broth and stir until the dressing is evenly moistened.
  • Add the shredded chicken, chopped onion, chopped celery, cream of chicken soup and milk to the bowl. Stir until everything is well combined. Season with salt and black pepper.
  • Transfer the mixture into the prepared baking dish, spreading it into an even layer. Dot the top with a little extra butter if desired.
  • Bake uncovered in the preheated oven for 40 to 45 minutes, or until the top is golden and the casserole is heated through.
  • Remove from the oven and let the casserole rest for 10 minutes. Garnish with chopped fresh parsley, serve warm, and enjoy.

Notes

This casserole is great for using leftover roast chicken. For a crispier top, sprinkle with shredded cheddar cheese during the last 10 minutes of baking.
Tried this recipe?Let us know how it was!

APPLE FRITTER CAKE

There are few aromas more comforting and inviting than cinnamon and baking apples, and this apple-fritter-cake brings that delightful essence right into your kitchen. It’s a true celebration of autumn, but honestly, I find myself craving it year-round. Imagine a tender, moist cake generously studded with soft, spiced apple chunks, all crowned with a sweet, crackly glaze that mimics the crispiness of a classic apple fritter – but without the fuss of deep-frying. This cake delivers all the flavor and charm of a beloved bakery treat in a simple, home-baked package that’s perfect for breakfast, brunch, or a cozy dessert.

My husband, Mark, absolutely adores this apple-fritter-cake. It started as an experiment a few years ago, when I was trying to recreate the magic of our favorite apple fritters from a small local bakery, but in a less messy, more “everyday” form. The first time I pulled it from the oven, the smell alone had him hovering in the kitchen. When he took that first bite, his eyes lit up, and he declared it “the perfect Sunday morning cake.” Since then, it’s become a cherished tradition. Whether we’re enjoying it with a strong cup of coffee on a lazy weekend or sharing a slice with friends during a casual get-together, this cake always brings a smile to his face and a cozy warmth to our home. It’s truly a staple for sweet moments.

Why You’ll Love This apple-fritter-cake

This apple-fritter-cake is a delightful way to enjoy all the comforting flavors of fall in an easy-to-make package. It’s incredibly versatile, perfect for a cozy breakfast, a special brunch, or a comforting dessert. The tender cake studded with sweet, spiced apples and a simple, crackly glaze is pure magic. You’ll love how the familiar flavors evoke a sense of nostalgia and warmth, making every bite a truly comforting experience. Plus, it fills your home with the most incredible aroma as it bakes, making your kitchen feel incredibly inviting.

Behind the Recipe

Creating the perfect apple-fritter-cake is all about balance: you want a tender, moist crumb, plenty of flavorful apple, and that essential sweet glaze. I’ve learned that the key to avoiding a soggy bottom is to use apples that hold their shape well, like Granny Smiths or Honeycrisps, and to chop them into consistent, manageable pieces. A common pitfall can be overmixing the batter, which can lead to a tough cake, so I always mix just until the ingredients are combined. Don’t skip the cinnamon in the batter and on the apples; it layers the flavor beautifully. And for that elevated touch, a slightly thicker glaze made with a hint of vanilla truly makes this cake sing, giving you that delightful fritter-like sweetness in every bite.

Shopping Tips

  • Apples: Choose firm, crisp apples like Granny Smith, Honeycrisp, or Fuji. Avoid mealy varieties that will break down too much during baking, leading to a mushy texture.
  • Flour: Stock up on good quality all-purpose flour. Make sure it’s fresh and stored in an airtight container to prevent staleness or absorption of odors.
  • Spices: Fresh cinnamon is paramount for this cake. If your ground cinnamon has been in the pantry for a year, it’s time for a fresh jar to ensure maximum flavor.
  • Baking Basics: Check the expiration dates on your baking powder and baking soda. Expired leavening agents are a common culprit for cakes that don’t rise properly.
  • Dairy: Buttermilk adds wonderful tenderness and tang. If you don’t have any, you can make a quick substitute by adding a tablespoon of lemon juice or white vinegar to regular milk and letting it sit for 5 minutes.
  • Fats & Oils: Unsalted butter is best for controlling the salt content in your baking. Choose a good quality butter, as its flavor will shine through in the cake.

Prep Ahead Ideas

You can peel and chop your apples a day in advance, storing them in an airtight container in the fridge with a splash of lemon juice to prevent browning. You can also mix all your dry ingredients together and store them in a sealed container, ready to be combined with the wet ingredients later. Even the glaze can be whisked together ahead of time and kept covered at room temperature, just give it a quick stir before drizzling.

Time-Saving Tricks

If you’re comfortable with it, a food processor can quickly chop your apples – just be careful not to over-process them into applesauce! Using pre-ground cinnamon and a ready-made buttermilk substitute (or having store-bought buttermilk on hand) saves time measuring and mixing. Lining your baking pan with parchment paper makes for easy cleanup and removal, cutting down on post-baking chores.

Common Mistakes

One of the most common mistakes is overmixing the batter, which develops the gluten too much and results in a tough, dense cake instead of a tender one. Another pitfall is using apples that release too much moisture; ensure your apples are patted dry before adding them to the batter. Don’t forget to properly grease and flour your pan, or use parchment, to prevent sticking. Lastly, underbaking can lead to a gummy center, so always check for doneness with a skewer.

What to Serve It With

This apple-fritter-cake is absolutely delightful on its own, but it also pairs beautifully with a hot cup of coffee or tea for breakfast or brunch. For a more decadent dessert, serve it warm with a scoop of vanilla bean ice cream or a dollop of freshly whipped cream. A light drizzle of caramel sauce would also be a lovely addition.

Tips & Mistakes

Storage Tips

Store in airtight containers in the fridge. It reheats beautifully, but if you sneak a bite cold straight from the container, it still works.

Variations and Substitutions

While the classic apple and cinnamon combination is hard to beat, you can certainly play around with the spices – a pinch of nutmeg or a dash of cardamom would be wonderful. For an added textural element, stir in a handful of chopped walnuts or pecans with the apples. If you want a different fruit, thinly sliced pears or even peaches (when in season) could work, though the firm texture of apples is truly what makes the “fritter” part of the cake so special. For dietary tweaks, you could experiment with a gluten-free all-purpose flour blend, but be mindful that the texture might vary slightly.


Frequently Asked Questions

What type of apples are best for this apple-fritter-cake?
For the best texture, I recommend using firm, tart-sweet apples like Granny Smith, Honeycrisp, Fuji, or Braeburn. These varieties hold their shape well during baking and offer a pleasant contrast to the soft cake crumb. Avoid softer, mealy apples as they tend to become mushy.

My apple-fritter-cake came out dense and heavy. What could have gone wrong?
A dense cake often results from overmixing the batter. Once you add the wet ingredients to the dry, mix only until just combined, with no visible streaks of flour. Overmixing develops the gluten, making the cake tough. Also, ensure your baking powder and soda are fresh, as expired leavening agents won’t provide the necessary lift.

How do I prevent the apples from sinking to the bottom of the cake?
To prevent apples from sinking, lightly toss your chopped apples with a tablespoon of the all-purpose flour before folding them into the batter. This thin coating helps them suspend more evenly throughout the cake as it bakes. Also, ensure your batter isn’t too thin; it should be thick enough to hold the fruit.

Can I freeze this apple-fritter-cake?
Yes, this apple-fritter-cake freezes beautifully. Once cooled completely, you can freeze individual slices or the entire cake (unglazed is best for freezing). Wrap it tightly in plastic wrap, then in foil, and store for up to 2-3 months. Thaw at room temperature and then glaze, or re-glaze, before serving.

How can I tell when the apple-fritter-cake is fully baked?
The cake is done when the top is golden brown and a wooden skewer or toothpick inserted into the center comes out clean or with just a few moist crumbs attached. If you see wet batter, it needs more time. Also, gently pressing the top of the cake should feel firm and spring back.

APPLE FRITTER CAKE

A moist, cinnamon-scented apple fritter cake with a simple vanilla glaze. Quick to mix and perfect for breakfast or dessert.
Prep Time 20 minutes
Cook Time 45 minutes
Total Time 1 hour 5 minutes
Servings 12

Ingredients
  

Main Ingredients

  • 2 cup all-purpose flour
  • 1 cup granulated sugar
  • 2 tsp baking powder
  • 0.5 tsp salt
  • 1 tsp ground cinnamon
  • 0.25 tsp ground nutmeg
  • 2 large eggs room temperature
  • 0.75 cup milk whole milk preferred
  • 0.5 cup unsalted butter melted and cooled
  • 1 tsp vanilla extract
  • 2 cup peeled and diced apples about 2 medium apples (Granny Smith or Fuji)
  • 2 tbsp brown sugar for apple toss (optional)
  • 1.5 cup powdered sugar for glaze
  • 2 tbsp milk for glaze (adjust to desired consistency)
  • 0.5 tsp vanilla extract for glaze

Instructions
 

Preparation Steps

  • Preheat the oven to 350°F (175°C). Grease and flour a 9x13-inch baking pan or line with parchment paper.
  • In a large bowl, whisk together the flour, granulated sugar, baking powder, salt, ground cinnamon, and nutmeg until evenly combined.
  • In a separate bowl, beat the eggs, then whisk in the milk, melted butter, and vanilla extract.
  • Pour the wet ingredients into the dry ingredients and stir until just combined. Do not overmix; a few small lumps are fine.
  • Toss the diced apples with brown sugar and a pinch of cinnamon if desired, then gently fold them into the batter.
  • Spread the batter evenly into the prepared baking pan and smooth the top with a spatula.
  • Bake for 40 to 45 minutes, or until a toothpick inserted into the center comes out clean and the top is golden brown.
  • Remove the cake from the oven and let it cool in the pan on a wire rack for 15 minutes.
  • While the cake cools slightly, make the glaze by whisking the powdered sugar, milk, and vanilla together until smooth. Adjust milk to reach a drizzling consistency.
  • Drizzle the glaze over the warm cake. Allow the glaze to set for a few minutes before slicing and serving.

Notes

Store leftovers covered at room temperature for up to 2 days or refrigerated for up to 5 days. Rewarm gently before serving.
Tried this recipe?Let us know how it was!

JOE’S CRAB SHACK CRAB CAKES

There’s something truly special about a perfect crab cake—that delicate balance of sweet, tender crab meat, just enough seasoning to enhance its natural flavor, and a golden, crisp exterior. This particular recipe for Joe’s Crab Shack-style crab cakes brings all of that to your kitchen, offering a delightful taste of the sea that’s both elegant and comforting. It’s a dish that feels like a special occasion, yet is surprisingly approachable to make at home, perfect for impressing guests or simply treating yourself to something truly delicious.

My husband, Mark, is a self-proclaimed seafood enthusiast, and crab cakes hold a particularly cherished spot in his culinary heart. For years, we’d make a point of visiting our favorite seafood spots, always ordering crab cakes, and he’d often sigh and say, “If only we could make them this good at home.” One anniversary, I decided it was time to crack the code. After a few attempts, some involving too much filler and others too little flavor, I finally landed on a recipe that brought that restaurant-quality magic right into our dining room. The first time he tasted these, his eyes lit up, and he declared them “spot on.” Now, they’re our go-to for celebrating small victories, a relaxing weekend dinner, or simply when we’re craving that perfect bite of oceanic goodness.

Why You’ll Love This joes-crab-shack-crab-cakes

  • It brings that beloved restaurant taste right to your kitchen, allowing you to recreate a classic without leaving home.
  • These crab cakes are wonderfully crab-forward, meaning the sweet, delicate flavor of the crab truly shines through, rather than being overwhelmed by fillers.
  • They’re surprisingly simple to prepare, even for those new to making seafood dishes, offering an impressive result with minimal fuss.
  • They’re incredibly versatile, equally at home as an appetizer for a dinner party or as the star of a weeknight meal.
  • The texture is heavenly—crisp and golden on the outside, tender and flaky on the inside—creating a delightful contrast in every bite.
  • Making them at home gives you full control over the quality of your ingredients, ensuring a fresh and wholesome dish every time.

Behind the Recipe

Crafting a truly excellent crab cake is all about respect for the star ingredient: the crab itself. What I’ve learned over the years is that the biggest pitfall is often overthinking it or overworking the mixture. The goal isn’t to create a dense patty, but rather a lightly bound cake where the crab remains the undeniable hero. A common mistake is using too much binder, whether it’s breadcrumbs or egg, which can lead to a bready, rather than crabby, texture. The small touches that elevate these include a judicious amount of Old Bay seasoning, a bright squeeze of lemon juice, and a gentle hand during mixing. The final sear is also crucial, creating that beautiful golden crust that contrasts so well with the tender interior.

Shopping Tips

  • Crab Meat: Opt for good quality lump or jumbo lump crab meat. While more expensive, it makes all the difference in texture and flavor. Look for pasteurized crab meat in the refrigerated section, not the canned shelf-stable variety.
  • Panko Breadcrumbs: These provide a lighter, crisper texture compared to traditional breadcrumbs. If you need a gluten-free option, there are excellent gluten-free panko varieties available.
  • Mayonnaise: Use a good quality, full-fat mayonnaise for the best flavor and binding. It adds richness and helps hold everything together without overwhelming the crab.
  • Old Bay Seasoning: This classic blend is essential for an authentic East Coast crab cake flavor. Check your spice cabinet to ensure it’s fresh and hasn’t lost its potency.
  • Fresh Herbs: Fresh parsley, finely chopped, adds a wonderful brightness and a touch of color. Look for vibrant green bunches with no wilting.
  • Lemon: Always have a fresh lemon on hand. You’ll use some juice in the mix, and wedges for serving are non-negotiable for that final burst of acidity.

Prep Ahead Ideas

You can mix all the ingredients for the crab cakes and form the patties up to 24 hours in advance. Arrange them on a plate or baking sheet lined with parchment paper, cover tightly with plastic wrap, and refrigerate. This actually helps them firm up, making them easier to handle and less likely to fall apart during cooking. Just remember to give them a quick gentle pat dry with a paper towel right before cooking if they seem a bit damp.

Time-Saving Tricks

If you’re really pressed for time, you can often find pre-chopped fresh parsley in the produce section of larger grocery stores. While not quite as vibrant as freshly chopped, it’s a decent shortcut. Also, consider using a good quality store-bought remoulade or tartar sauce if you don’t want to make your own from scratch, though a homemade version is always a lovely touch.

Common Mistakes

One of the most frequent mistakes is overmixing the crab meat with the binder. This can break up the delicate crab lumps and lead to a tough, dense crab cake. Mix gently until just combined. Another pitfall is not chilling the formed cakes; chilling helps them firm up, preventing them from crumbling in the pan. Finally, don’t overcrowd your pan when searing. Cook in batches to ensure proper browning and a beautiful crisp crust.

What to Serve It With

These crab cakes are fantastic with a simple squeeze of fresh lemon, but they also pair beautifully with a zesty homemade remoulade sauce or a classic tartar sauce. For side dishes, think light and fresh to complement the richness of the crab. A crisp green salad with a vinaigrette, roasted asparagus, corn on the cob, or a creamy coleslaw are all excellent choices.

Tips & Mistakes

To ensure the best crust, make sure your pan and oil are adequately heated before adding the crab cakes. A medium-high heat allows for a golden-brown exterior without overcooking the inside. Resist the urge to press down on the crab cakes as they cook, as this can squeeze out moisture and compromise their texture.

Storage Tips

Store in airtight containers in the fridge. It reheats beautifully, but if you sneak a bite cold straight from the container, it still works.

Variations and Substitutions

For a gluten-free version, simply use gluten-free panko breadcrumbs or finely crushed gluten-free crackers as your binder. If you prefer a slightly spicier kick, a dash of Tabasco or a pinch of cayenne pepper in the mix can be a delightful addition. While the classic pan-fried method yields the best texture, these can also be baked at 375°F (190°C) for about 15-20 minutes, flipping halfway, for a lighter option. However, for that truly authentic, crispy exterior, pan-searing is definitely the way to go.

Frequently Asked Questions

What’s the best type of crab meat to use for these crab cakes?
For the best texture and flavor, I highly recommend using lump or jumbo lump crab meat. These larger pieces really showcase the delicate sweetness of the crab and create that desirable flaky consistency in the finished cake.

My crab cakes keep falling apart when I try to cook them. What am I doing wrong?
There are a few common culprits! Ensure you’re not overmixing the crab, as this breaks down the delicate lumps. More importantly, make sure to chill the formed crab cakes for at least 30 minutes before cooking; this firms them up significantly, making them much more stable in the pan.

Can I bake these crab cakes instead of pan-frying them?
Yes, you can certainly bake them for a lighter version, though you’ll miss out on some of that glorious crispy sear. Bake at 375°F (190°C) for about 15-20 minutes, flipping halfway through, until they’re golden brown and heated through.

How can I make these crab cakes gluten-free?
Making these gluten-free is very simple! Just substitute the regular panko breadcrumbs with a gluten-free panko variety. Most grocery stores now carry excellent gluten-free options that will work perfectly as a binder without compromising texture.

JOE’S CRAB SHACK CRAB CAKES

Classic Joe’s Crab Shack–style crab cakes made with lump crab, light seasoning, and a crisp golden exterior. Quick to prepare and perfect for serving with lemon and tartar sauce.
Prep Time 20 minutes
Cook Time 12 minutes
Total Time 32 minutes
Servings 4

Ingredients
  

Main Ingredients

  • 16 ounce lump crab meat pick through for shells
  • 0.5 cup mayonnaise
  • 0.75 cup plain breadcrumbs preferably panko
  • 1 piece large egg
  • 1 tablespoon Dijon mustard
  • 0.5 teaspoon Worcestershire sauce
  • 1 teaspoon Old Bay seasoning
  • 1 tablespoon fresh lemon juice
  • 2 tablespoon chopped fresh parsley
  • 2 stalk green onions, thinly sliced
  • 2 tablespoon unsalted butter or vegetable oil for frying
  • 0.25 teaspoon salt
  • 0.25 teaspoon black pepper

Instructions
 

Preparation Steps

  • In a large bowl, whisk together mayonnaise, large egg, Dijon mustard, Worcestershire sauce, Old Bay seasoning, fresh lemon juice, chopped parsley, salt, and black pepper until smooth.
  • Gently fold the lump crab meat into the dressing mixture, being careful to keep the lumps intact. Add the breadcrumbs and sliced green onions and fold until just combined.
  • Divide the mixture into 4 equal portions and form each into a compact patty about 1 inch thick. Place patties on a plate, cover, and refrigerate for 15 minutes to firm up.
  • Heat unsalted butter (or oil) in a large skillet over medium heat. Add the crab cakes and cook until golden brown, about 3 to 4 minutes per side, turning carefully.
  • Transfer cooked crab cakes to a paper towel–lined plate to drain briefly. Serve hot with lemon wedges and tartar sauce if desired.

Notes

For best results use lump crab meat and avoid overmixing to keep cakes light. These can be baked at 400°F for 12–15 minutes for a lighter version.
Tried this recipe?Let us know how it was!

RED LOBSTER’S CHEESE BISCUIT (IN A LOAF)

If you’ve ever found yourself daydreaming about those irresistible cheesy, garlicky biscuits from a certain seafood restaurant, get ready for a game-changer. This recipe takes all that glorious flavor and bakes it into a convenient, sliceable loaf. It’s a quick bread that’s moist, tender, packed with sharp cheddar and fragrant garlic, and finished with a brush of buttery, herb-infused goodness. It’s perfect for dipping into soups, alongside a weeknight dinner, or simply enjoyed on its own with a cup of coffee.

My husband, bless his heart, is a true connoisseur of anything cheesy and carb-loaded, and those restaurant biscuits have always been a particular weakness of his. For years, I’d try to replicate them, often ending up with a kitchen covered in flour and individual biscuits that, while delicious, felt like a lot of fuss. Then, one evening, preparing a simple pasta dinner, I had a flash of inspiration: why not bake the biscuit dough as a loaf? The first time I pulled that golden, aromatic loaf from the oven, the smell alone had him floating into the kitchen. He grabbed a slice, still warm, and declared it “even better than the original, because it’s ours.” It’s been a staple ever since, a dish that guarantees smiles and empty plates, a testament to how some of the best culinary moments come from simplifying and making things your own.

Why You’ll Love This red-lobsters-cheese-biscuit-in-a-loaf

Here’s a beautiful way to enjoy all the savory, cheesy goodness you adore, without the fuss of individual drop biscuits. This loaf is incredibly easy to prepare, relying on simple pantry staples and a quick mixing method that doesn’t require any special skills. It’s wonderfully versatile, pairing perfectly with anything from a hearty chili to a light salad, making it a reliable staple for busy weeknights or relaxed weekend meals. Plus, the sheer joy of pulling a warm, aromatic loaf from the oven, ready to be sliced and shared, is an experience in itself. It offers comfort and satisfaction in every tender, cheesy bite.

Behind the Recipe

What I’ve really learned while perfecting this recipe is the delicate balance between tenderness and flavor. The key truly lies in not overworking the dough—overmixing is the archenemy of tender quick breads. I’ve found that a light touch, mixing just until the dry ingredients are barely moistened, ensures that soft, crumbly texture we all crave. Another small but mighty detail is the quality of your cheese; a good sharp cheddar makes all the difference. And that final brush of garlic butter after it comes out of the oven? Absolutely non-negotiable. It infuses the warm crust with an extra layer of garlicky aroma and helps keep the exterior wonderfully tender. Don’t skip it!

Shopping Tips

  • Cheese: Opt for a block of sharp cheddar cheese and grate it yourself. Pre-shredded varieties often contain anti-caking agents that can affect how smoothly the cheese melts and integrates into the loaf.
  • Dairy: Buttermilk is essential for the distinctive tang and tender crumb in this recipe. If you don’t have any, you can make a quick substitute by adding a tablespoon of lemon juice or white vinegar to regular milk and letting it sit for five minutes.
  • Butter: Always use unsalted butter so you can control the overall saltiness of the loaf. Keep it very cold and cut into small pieces before adding it to the flour mixture for the best texture.
  • Flour: Standard all-purpose flour works perfectly here. There’s no need for any specialty flours to achieve a wonderful texture.
  • Garlic Powder: This is a key flavor component. Make sure your jar isn’t ancient—fresh garlic powder has a much more potent and vibrant flavor than an old, stale one.
  • Fresh Herbs: While dried parsley is fine, a sprinkle of fresh chopped parsley mixed into the dough or as a garnish for the glaze really brightens up the flavor and adds a lovely visual pop.

Prep Ahead Ideas

You can grate your cheese and measure out all your dry ingredients (flour, baking powder, salt, garlic powder) into a bowl the day before. Cover them tightly and store them in the fridge or pantry. This means on baking day, you just need to cut in the cold butter, add the wet ingredients, and you’re almost ready to bake!

Time-Saving Tricks

If you’re really pressed for time, using a food processor to cut the cold butter into the flour mixture can save a few minutes and some elbow grease. Just be careful to pulse only a few times until the mixture resembles coarse crumbs, to avoid overworking the dough. Pre-shredded cheese can also be used in a pinch, though the melting quality might be slightly different.

Common Mistakes

The most common mistake is overmixing the dough. Once you add the wet ingredients, mix only until the flour streaks disappear. Lumps are okay; overmixing develops gluten, leading to a tough, dry loaf. Another pitfall is using warm butter; cold butter creates pockets of steam that result in a flakier, tender texture. Lastly, don’t skimp on the cheese—this loaf is meant to be generously cheesy!

What to Serve It With

This savory cheese biscuit loaf is incredibly versatile! It’s fantastic alongside a steaming bowl of homemade chili, a hearty lentil soup, or a creamy tomato bisque. It also makes a wonderful accompaniment to roasted chicken, a simple steak dinner, or even a robust pasta dish. Think of it as your new favorite savory sidekick.

Tips & Mistakes

Don’t be shy about adjusting the amount of garlic powder to your personal taste; some like it extra garlicky! Also, ensure your oven is fully preheated before putting the loaf in, as consistent temperature is crucial for proper rise and even baking.

Storage Tips

Store in airtight containers in the fridge. It reheats beautifully, but if you sneak a bite cold straight from the container, it still works.

Variations and Substitutions

For cheese, feel free to experiment with a mix of cheddar and Monterey Jack, or even a little Parmesan for an extra savory kick. If you don’t have fresh parsley, dried works perfectly well, or you could try a pinch of dried chives or dill for a slightly different herby note. For a bit of heat, a tiny pinch of cayenne pepper in the dough adds a subtle warmth without being overtly spicy. While buttermilk gives the best flavor and texture, a milk and lemon juice/vinegar substitute is a perfectly acceptable alternative.

Frequently Asked Questions

Can I use pre-shredded cheese in this recipe?
Yes, you absolutely can use pre-shredded cheese for convenience, though grating cheese from a block typically yields a smoother melt and richer flavor. If using pre-shredded, toss it with a teaspoon of flour before adding to the dough to help prevent clumping and ensure even distribution.

My biscuit loaf came out tough and dense. What went wrong?
A tough or dense loaf is almost always a sign of overmixing the dough. For quick breads like this, it’s crucial to mix the wet and dry ingredients only until they are just combined and no streaks of flour remain. Lumps in the dough are perfectly fine and will bake out, contributing to a tender crumb.

How do I know when the red-lobsters-cheese-biscuit-in-a-loaf is fully baked?
The loaf is typically done when it’s beautifully golden brown on top and a wooden skewer or toothpick inserted into the very center comes out clean. An internal temperature of 200-210°F (93-99°C) is also a good indicator, but visual cues and the toothpick test are usually sufficient.

Can I prepare the dough ahead of time and bake it later?
It’s best to bake this biscuit loaf immediately after mixing the dough for optimal rise and texture. However, you can prepare the dry ingredients and grate the cheese a day in advance. Store them separately and combine just before baking.

Can I freeze the baked red-lobsters-cheese-biscuit-in-a-loaf?
Yes, this biscuit loaf freezes very well! Once it’s completely cooled, wrap the loaf tightly in plastic wrap, then an additional layer of aluminum foil. It can be stored in the freezer for up to 2-3 months. Thaw it overnight in the refrigerator and reheat in a moderate oven until warmed through.

RED LOBSTER’S CHEESE BISCUIT (IN A LOAF)

Quick cheesy pull-apart loaf inspired by Red Lobster’s Cheddar Bay Biscuits — rich, buttery, and loaded with sharp cheddar. Perfect warm from the oven for sharing.
Prep Time 15 minutes
Cook Time 30 minutes
Total Time 45 minutes
Servings 10

Ingredients
  

Main Ingredients

  • 3 cup all-purpose flour
  • 2 teaspoon baking powder
  • 0.5 teaspoon baking soda
  • 1 teaspoon kosher salt
  • 2 tablespoon granulated sugar
  • 0.5 cup unsalted butter cold, cut into cubes
  • 8 ounce sharp cheddar cheese freshly shredded
  • 0.75 cup buttermilk or whole milk + 1 tablespoon lemon juice
  • 2 piece large egg
  • 1 teaspoon garlic powder optional
  • 1 tablespoon dried parsley for topping
  • 3 tablespoon melted butter for brushing

Instructions
 

Preparation Steps

  • Preheat the oven to 375°F (190°C). Grease a standard loaf pan and line with parchment if desired.
  • In a large bowl, whisk together the flour, baking powder, baking soda, salt, and sugar until evenly combined.
  • Cut the cold butter into the dry ingredients using a pastry cutter or fork until the mixture resembles coarse crumbs with pea-sized pieces of butter.
  • Fold in the shredded cheddar cheese so it is evenly distributed through the flour mixture.
  • In a separate bowl, whisk together the buttermilk and eggs until smooth. Pour the wet ingredients into the dry ingredients and stir gently until just combined — do not overmix.
  • Spoon the batter into the prepared loaf pan, smoothing the top with a spatula. Sprinkle the top with a little extra shredded cheddar and the dried parsley.
  • Bake for 25 to 30 minutes, or until the top is golden and a toothpick inserted in the center comes out clean.
  • Remove the loaf from the oven and immediately brush the top with melted butter mixed with the garlic powder. Let the loaf cool in the pan for 10 minutes, then transfer to a wire rack to cool slightly.
  • Slice and serve warm. Store leftover slices tightly wrapped at room temperature for up to 2 days or refrigerate for up to 5 days.

Notes

For best texture, shred the cheese fresh and avoid overmixing the batter. Warm the loaf slightly before serving for maximum gooeyness.
Tried this recipe?Let us know how it was!

CROCKPOT RANCH PORK CHOPS

This crockpot ranch pork chops recipe is the ultimate answer to those busy weeknights when you crave something deeply flavorful and comforting but have minimal time to spend in the kitchen. Imagine tender, juicy pork chops bathed in a creamy, savory ranch sauce, all cooked slowly to perfection while you go about your day. It’s a truly set-it-and-forget-it meal that promises big flavor with little effort, making it a firm family favorite and a perfect addition to your weekly rotation.

My husband, Mark, is usually the one who gets home first on weekdays, and there’s nothing quite like the aroma of dinner already cooking when he walks through the door. This recipe became a staple in our home entirely by accident. I had a package of pork chops nearing their date and a ranch seasoning packet I’d forgotten about in the pantry. A quick search later, and this simple, genius idea popped up. The first time I made it, Mark immediately declared it a winner, and our picky eater, Lily, even asked for seconds! Now, it’s a regular request, especially when we know we have a packed evening of school activities or late meetings. It’s a heartwarming, fuss-free meal that feels like a big hug at the end of a long day.

Why You’ll Love This crockpot-ranch-pork-chops

This crockpot-ranch-pork-chops recipe is a game-changer for so many reasons, making it an absolute must-try in your kitchen.
It’s incredibly simple to prepare, requiring just a few minutes of hands-on time before your slow cooker takes over, freeing you up for other tasks.
The flavor profile is a delightful blend of savory, creamy, and herbaceous notes from the ranch seasoning, appealing to even the pickiest eaters.
You’ll achieve exceptionally tender and juicy pork chops every single time, as the slow cooking process prevents them from drying out, unlike other methods.
This dish is remarkably versatile, pairing wonderfully with a wide array of side dishes from mashed potatoes to roasted vegetables, making meal planning a breeze.
Cleanup is a dream, especially if you use a slow cooker liner, turning a potentially messy endeavor into an easy wipe-down.

Behind the Recipe

What I’ve learned most about making crockpot ranch pork chops is that simplicity truly reigns supreme. People often worry about pork chops drying out, but the slow cooker, combined with the creamy sauce, creates such a forgiving environment. The biggest secret is not to overthink it; just let the magic happen. A small touch that really elevates this dish, if you have an extra moment, is a quick sear on the chops before adding them to the slow cooker. It creates a beautiful depth of flavor and a lovely crust, though it’s absolutely not essential for a delicious meal. The main thing people trip up on is checking the doneness too often, which can release heat and extend cooking time, or worse, trying to cook them too quickly on high, which can sometimes lead to tougher results. Trust the process and the low and slow method for that melt-in-your-mouth tenderness.

Shopping Tips

  • Pork Chops: Opt for boneless, thick-cut pork chops (about 1-inch thick) as they tend to stay juicier in the slow cooker. If you prefer bone-in, they also work beautifully but may take a little longer to cook.
  • Ranch Seasoning: You’ll need a packet of dry ranch seasoning mix. Any popular brand will work, or if you make your own from scratch, adjust the quantity to your taste preferences.
  • Cream Soup: A can of condensed cream of mushroom or cream of chicken soup provides the creamy base. Look for low-sodium versions if you’re mindful of salt intake, especially since the ranch seasoning also contains sodium.
  • Broth/Stock: Keep some chicken or vegetable broth on hand to thin out the sauce if it becomes too thick. Low-sodium varieties are always a good choice for better control over the final seasoning.
  • Fresh Herbs: While optional, a sprinkle of fresh parsley or chives at the end adds a pop of color and freshness. Check for bright green leaves and a fresh aroma.

Prep Ahead Ideas

This recipe is already wonderfully simple, but you can shave off a few more minutes by prepping your ingredients ahead of time. You can whisk together the ranch seasoning mix with the cream of mushroom soup and broth in a bowl and store it covered in the fridge for up to a day. If you plan to add any vegetables like sliced onions or minced garlic, have those chopped and ready to go in separate containers.

Time-Saving Tricks

The biggest time-saver for this recipe is embracing the “no-sear” method. While browning the chops can add a layer of flavor, skipping this step entirely means your hands-on time is literally minutes—just combine ingredients and go. Using a slow cooker liner makes cleanup incredibly quick, turning post-dinner dread into a simple toss-and-wipe experience.

Common Mistakes

The most common mistake with crockpot ranch pork chops is overcooking the pork. Pork chops can become dry and tough if cooked for too long, even in a slow cooker. Another pitfall is not having enough liquid, which can lead to a scorched bottom or a sauce that’s too thick. Lastly, resist the urge to constantly open the lid, as this releases heat and can significantly extend the cooking time.

What to Serve It With

These crockpot ranch pork chops are incredibly versatile. They pair perfectly with creamy mashed potatoes or fluffy white rice to soak up all that delicious sauce. Steamed green beans, roasted asparagus, or a simple side salad offer a fresh contrast. For a heartier meal, consider serving them alongside egg noodles or even baked sweet potatoes.

Tips & Mistakes

Storage Tips

Store in airtight containers in the fridge. It reheats beautifully, but if you sneak a bite cold straight from the container, it still works.

Variations and Substitutions

You can easily adapt this recipe to fit your preferences or what you have on hand. If you’re not a fan of cream of mushroom soup, condensed cream of chicken soup works just as well, or for a lighter sauce, try substituting it with a mix of chicken broth and a touch of cream cheese or sour cream at the end. Feel free to add in some chopped potatoes, carrots, or even some frozen peas and corn during the last hour of cooking for a complete meal. For a bit of heat, a pinch of red pepper flakes would be a nice addition. If pork chops aren’t available, boneless, skinless chicken thighs can be used with equally delicious results, though their cooking time might vary slightly.

Frequently Asked Questions

How do I prevent the pork chops from becoming dry and tough?
To keep your pork chops tender and juicy, ensure you’re using thick-cut chops and avoid overcooking. The slow cooker’s moist environment helps, but cooking on the “low” setting for the recommended time (typically 3-4 hours) is best. Using a creamy sauce base also contributes to their moistness.

Can I add vegetables directly to the crockpot with the pork chops?
Absolutely! Adding vegetables like chopped potatoes, carrots, or even onions and bell peppers works wonderfully. For root vegetables, add them at the beginning with the pork chops. Softer vegetables like peas or corn can be stirred in during the last 30-60 minutes of cooking to prevent them from becoming too mushy.

What if I don’t have a packet of dry ranch seasoning mix?
You can create your own homemade ranch seasoning by combining dried parsley, dried dill, garlic powder, onion powder, salt, and black pepper. Use about two tablespoons of this mixture as a substitute for one store-bought packet to achieve a similar flavor profile.

Can this recipe be made dairy-free or gluten-free?
To make it dairy-free, use a dairy-free cream of mushroom soup substitute or create a sauce from dairy-free milk and a thickener like cornstarch. Ensure your ranch seasoning mix is dairy-free, as some contain buttermilk powder. For gluten-free, use gluten-free cream of mushroom soup and confirm your ranch seasoning mix is certified gluten-free.

CROCKPOT RANCH PORK CHOPS

Tender pork chops slow-cooked in a creamy ranch and mushroom sauce. Easy prep and great for a weeknight dinner served over rice or mashed potatoes.
Prep Time 15 minutes
Cook Time 4 hours
Total Time 4 hours 15 minutes
Servings 6

Ingredients
  

Main Ingredients

  • 3 pound pork chops bone-in or boneless, about 6 medium chops
  • 1 ounce ranch dressing mix one 1 oz packet
  • 10.5 ounce condensed cream of mushroom soup one can
  • 0.5 cup water
  • 2 tablespoon unsalted butter melted
  • 1 tablespoon olive oil optional, for searing
  • 1 teaspoon garlic powder
  • 0.5 teaspoon black pepper
  • 1 teaspoon onion powder
  • 1 teaspoon paprika

Instructions
 

Preparation Steps

  • Season pork chops on both sides with garlic powder, onion powder, paprika, and black pepper.
  • If using, heat olive oil in a skillet over medium-high heat and sear pork chops 2 minutes per side until lightly browned (optional step adds flavor).
  • Place pork chops in the bottom of the slow cooker in a single layer or slightly overlapping.
  • In a bowl, whisk together the cream of mushroom soup, ranch dressing mix, melted butter, and water until smooth.
  • Pour the sauce evenly over the pork chops, covering them as much as possible.
  • Cover and cook on low for 4 to 5 hours or on high for 2 to 3 hours, until pork reaches an internal temperature of 145°F and is tender.
  • Serve pork chops with sauce spooned over top. Pair with mashed potatoes, rice, or steamed vegetables.

Notes

For extra creaminess, stir in 0.5 cup sour cream at the end of cooking and warm through before serving.
Tried this recipe?Let us know how it was!

SLOW COOKER BROWN SUGAR CHICKEN

There’s something truly magical about a meal that takes minimal effort but delivers maximum flavor, and this slow-cooker brown sugar chicken is exactly that kind of recipe. Imagine tender, fall-apart chicken bathed in a sticky, sweet, and savory sauce that’s utterly irresistible. It’s a dish that promises comfort, convenience, and a burst of delightful flavor, making it an absolute must-try for anyone seeking a delicious weeknight win without the fuss.

This brown sugar chicken has become an absolute cornerstone in our home, often saving me on the busiest of evenings. I remember one particularly hectic Tuesday, after juggling school pickups, soccer practice, and an unexpected work deadline, I realized dinner was an hour away and I hadn’t even thought about it. Luckily, I’d prepped this in the slow cooker that morning. The aroma that filled the house when we walked in was pure bliss, a warm and welcoming hug after a long day. My husband, bless his heart, declared it “the best smell in the world,” and the kids, usually picky, devoured every last bite over a bed of fluffy rice. From that day on, it earned its permanent spot in our rotation, a reliable, crowd-pleasing dish that makes everyone at the table happy.

Why You’ll Love This slow-cooker-brown-sugar-chicken

You’re going to fall head over heels for this recipe because it truly delivers on all fronts – flavor, ease, and sheer satisfaction.

  • It’s incredibly simple to prepare, mostly a “dump and go” affair that lets your slow cooker do all the heavy lifting. Just a few minutes of prep in the morning, and dinner is practically ready by evening.
  • The flavor profile is absolutely addicting: a perfect harmony of sweet brown sugar, tangy apple cider vinegar, savory soy sauce, and aromatic garlic and ginger. It’s a combination that appeals to nearly everyone.
  • The chicken emerges unbelievably tender and juicy, practically falling apart with a fork. Slow cooking ensures every piece is infused with that incredible sauce, resulting in a melt-in-your-mouth texture.
  • This dish is wonderfully versatile and pairs beautifully with so many sides, from a simple bed of rice or quinoa to steamed vegetables or a fresh green salad. It adapts effortlessly to what you have on hand.
  • It’s a proven family favorite, even with picky eaters. The sweet and savory notes are universally appealing, making it a reliable meal for busy weeknights when you need everyone to clear their plates.
  • Leftovers are a dream! This chicken reheats beautifully, making it an excellent candidate for meal prep. You’ll be looking forward to lunch the next day.

Behind the Recipe

Developing the perfect slow-cooker brown sugar chicken taught me a few valuable lessons. First, while chicken breasts work, boneless, skinless chicken thighs truly shine here. They stay incredibly moist and tender during the long cooking process, absorbing all that glorious sauce without drying out. Another crucial insight is the balance of flavors; the apple cider vinegar isn’t just an afterthought—it’s essential for cutting through the sweetness of the brown sugar, giving the sauce a vibrant tang that prevents it from being cloying. Finally, don’t skip the cornstarch slurry at the end. It’s the secret to transforming a watery liquid into that rich, glossy, sticky sauce that clings beautifully to the chicken and rice, making it feel like a truly restaurant-worthy meal.

Shopping Tips

  • Chicken: Opt for boneless, skinless chicken thighs for the most tender, juicy results, as they hold up wonderfully during slow cooking. If you prefer white meat, chicken breasts can also be used, but keep an eye on them to prevent overcooking.
  • Brown Sugar: Both light or dark brown sugar work beautifully here. Dark brown sugar will lend a slightly richer, deeper molasses flavor, while light brown sugar offers a milder sweetness.
  • Soy Sauce: Choose a good quality, low-sodium soy sauce. This allows you to control the overall saltiness of the dish and adjust to your preference. Tamari is an excellent gluten-free alternative.
  • Aromatics: Fresh garlic cloves and ginger root will provide the best flavor depth. Look for firm, unblemished garlic and ginger with smooth skin. Pre-minced versions are a handy shortcut if you’re in a pinch.
  • Apple Cider Vinegar: Don’t underestimate the power of this ingredient! It’s crucial for balancing the sweetness and adding a bright, tangy note. Any standard brand will work well.
  • Cornstarch: This pantry staple is key for thickening your sauce to that desirable glossy, sticky consistency. Check the expiration date to ensure it’s still effective.

Prep Ahead Ideas

To make busy weeknights even smoother, you can prepare a few components of this recipe in advance. Whisk together all the sauce ingredients (brown sugar, soy sauce, vinegar, garlic, ginger, etc.) in a jar or airtight container and store it in the fridge for up to 3-4 days. You can also trim and cut your chicken thighs into larger pieces ahead of time, ready to drop into the slow cooker. Having these elements prepped means you’re just minutes away from assembling dinner when morning chaos hits.

Time-Saving Tricks

When time is truly of the essence, don’t hesitate to lean on a few smart shortcuts. Using pre-minced garlic and ginger can shave off valuable minutes from your prep time. If your grocery store offers pre-cut chicken thighs, grab those! And for the easiest cleanup, consider using a slow cooker liner; it turns scrubbing into a simple toss-and-go. These small adjustments won’t compromise flavor but will significantly streamline your cooking process.

Common Mistakes

One common pitfall is overcooking the chicken, especially if using breasts, which can lead to dry, stringy meat. Always check for doneness with a meat thermometer (165°F/74°C). Another frequent mistake is skipping the cornstarch slurry at the end, which results in a thin, watery sauce instead of the desired sticky glaze. Make sure to dissolve the cornstarch completely in a bit of cold water before whisking it into the hot sauce to avoid lumps. Also, remember to taste and adjust the seasoning before serving—sometimes a little extra salt or a pinch of red pepper flakes can make all the difference.

What to Serve It With

This slow-cooker brown sugar chicken is incredibly versatile! It pairs beautifully with a steaming bowl of fluffy white rice or hearty brown rice, which soaks up all that amazing sauce. For a lighter meal, consider serving it with quinoa or even cauliflower rice. Roasted vegetables like broccoli, green beans, or asparagus make a perfect accompaniment, adding a fresh, vibrant crunch. A simple side salad with a light vinaigrette would also complement the richness of the chicken wonderfully.

Tips & Mistakes

Storage Tips

Store in airtight containers in the fridge. It reheats beautifully, but if you sneak a bite cold straight from the container, it still works.

Variations and Substitutions

This recipe is wonderfully adaptable! For a different protein, boneless, skinless chicken breasts work well, though you might want to reduce the cooking time slightly to prevent them from drying out. If you’re out of brown sugar, honey or maple syrup can be used for a slightly different, but still delicious, sweetness. For a gluten-free version, simply swap out the soy sauce for tamari. Want a little heat? A pinch of red pepper flakes added with the sauce ingredients will give it a nice kick. You could even add some pineapple chunks for a tropical, Hawaiian-inspired twist. While these variations are great, the classic combination of brown sugar, soy, garlic, and ginger truly is a timeless winner for its balanced, comforting flavor.

Frequently Asked Questions

Can I use frozen chicken in the slow cooker for this recipe?
While it’s generally recommended to use thawed chicken for even cooking and food safety, you can use frozen chicken thighs in a pinch. Just be sure to add an extra hour or two to the cooking time on low, and always confirm the internal temperature reaches 165°F (74°C).

My sauce seems too thin; how can I make it thicker?
The secret to a perfectly thick, glossy sauce is the cornstarch slurry at the end. After the chicken is cooked, remove it from the slow cooker. In a small bowl, whisk 1-2 tablespoons of cornstarch with an equal amount of cold water until smooth, then stir it into the hot sauce in the slow cooker. Cook on high for 15-30 minutes, stirring occasionally, until it thickens to your desired consistency.

Can I prepare the chicken and sauce the night before?
Absolutely! This recipe is fantastic for meal prep. You can whisk together all the sauce ingredients and chop your chicken, then store them separately in airtight containers in the refrigerator overnight. In the morning, simply combine everything in your slow cooker and start cooking.

How long will leftover slow-cooker brown sugar chicken last in the fridge?
Properly stored in an airtight container, your leftover slow-cooker brown sugar chicken will stay fresh in the refrigerator for 3-4 days. It reheats beautifully in the microwave or on the stovetop, making it perfect for quick lunches or dinners throughout the week.

What if I don’t have apple cider vinegar?
Apple cider vinegar provides a unique tang that balances the sweetness, but if you don’t have it, you can substitute with white vinegar or rice vinegar. Lemon juice can also work, but use a slightly smaller amount and taste as you go, as it has a more pronounced citrus flavor.

SLOW COOKER BROWN SUGAR CHICKEN

Tender slow-cooked chicken in a sweet and savory brown sugar sauce. Minimal prep and great served over rice or mashed potatoes for an easy weeknight meal.
Prep Time 15 minutes
Cook Time 4 hours
Total Time 4 hours 15 minutes
Servings 6

Ingredients
  

Main Ingredients

  • 3 lb boneless skinless chicken breasts
  • 0.75 cup brown sugar packed
  • 0.5 cup ketchup
  • 0.25 cup soy sauce use low-sodium if preferred
  • 2 tbsp unsalted butter melted
  • 3 clove garlic, minced
  • 1 medium onion, chopped
  • 0.5 tsp black pepper
  • 0.5 tsp salt adjust to taste
  • 2 tbsp cornstarch optional, mixed with 2 tbsp water to thicken

Instructions
 

Preparation Steps

  • Place the chicken breasts in the bottom of the slow cooker and season lightly with salt and black pepper.
  • In a bowl, whisk together the brown sugar, ketchup, soy sauce, melted butter, minced garlic, and chopped onion until smooth.
  • Pour the sauce evenly over the chicken in the slow cooker.
  • Cover and cook on low for 4 hours (or on high for 2 hours) until the chicken is cooked through and tender.
  • Remove the chicken and shred with two forks, then return the shredded chicken to the slow cooker and stir to coat with the sauce.
  • If you prefer a thicker sauce, mix the cornstarch with cold water to make a slurry, stir into the slow cooker, and cook on high for an additional 10 minutes until thickened.
  • Serve the brown sugar chicken over rice, mashed potatoes, or in sandwiches. Garnish with chopped green onions if desired.

Notes

Leftovers keep well in the refrigerator for up to 4 days and freeze nicely for up to 3 months. Adjust soy sauce and salt for lower sodium.
Tried this recipe?Let us know how it was!

MEXICAN RESTAURANT STYLE WHITE CHEESE

MEXICAN RESTAURANT STYLE WHITE CHEESE (QUESO) DIP

There’s just something undeniably comforting about a warm, velvety bowl of queso. That iconic white cheese dip you find at your favorite Mexican restaurant often feels like a secret, impossible to recreate at home. But I’m here to tell you that it’s not only possible, it’s surprisingly simple to master. This recipe delivers that perfect balance of creamy, smooth texture and mild, savory flavor with just a hint of spice, making it an absolute must-have for any gathering, or even just a cozy night in.

My husband, Mark, absolutely adores this queso. For years, every time we went out for Mexican, his first order was always a side of the white cheese dip, sometimes even before his actual meal arrived. He’d try to dissect the flavors, convinced there was some mystical ingredient we were missing at home. Then, one ordinary Tuesday, I decided to tackle the quest myself. I experimented with different cheeses and ratios, and when I finally brought a steaming bowl to the living room during our usual movie night, his eyes lit up. He took one bite, paused, and then just kept scooping. “This is it,” he declared, mouth full, a cheesy grin on his face. “This is better than the restaurant!” From that night on, our homemade queso became a mandatory part of our Friday night tradition, a symbol of relaxed evenings and delicious indulgence that never fails to bring a smile to his face.

Why You’ll Love This mexican-restaurant-style-white-cheese-queso-dip

This queso tastes just like your favorite Mexican restaurant’s version, meaning you can satisfy that craving anytime without leaving your house. It comes together incredibly fast, often in under 15 minutes, making it perfect for last-minute guests or an impromptu snack attack. The smooth, velvety texture is pure comfort, luxurious and perfectly dippable, without any grittiness. It’s also incredibly versatile – fantastic on its own with chips, but also a killer topping for tacos, nachos, burritos, or even drizzled over roasted vegetables.

Behind the Recipe

My journey to perfect this queso taught me a few crucial lessons. The biggest one is patience with the heat; a gentle, consistent warmth is your best friend when melting cheese to avoid a grainy or separated mess. I’ve found that using quality white American cheese from the deli counter, rather than pre-shredded bags, makes an enormous difference in achieving that silky-smooth texture. A touch of fresh onion and jalapeño, sautéed briefly, really brightens the flavor without overpowering the cheese. The goal isn’t just melted cheese, but a cohesive, slightly viscous sauce that coats a chip beautifully. It’s those little touches, like finely mincing the aromatics and adding them early, that prevent your queso from tasting flat and elevate it from a simple dip to something truly special.

Shopping Tips

  • Cheese: For that authentic, super-smooth restaurant-style queso, look for white American cheese from the deli counter. It melts beautifully without becoming oily or gritty. You can also experiment with a blend of Monterey Jack and a touch of Oaxaca or Asadero.
  • Dairy: Whole milk or half-and-half will give you the best creamy consistency. Avoid skim milk, as it might make your queso too thin and less rich. Heavy cream can be used for an extra decadent dip.
  • Fresh Produce: Grab a small white onion, a few cloves of garlic, and a fresh jalapeño or serrano pepper. Freshness here makes a big difference in flavor, providing a bright counterpoint to the richness of the cheese.
  • Spices: A good quality ground cumin, while optional, adds a subtle warmth and authentic depth to the queso. Keep your salt and pepper on hand for seasoning to taste.
  • Dippers: Don’t forget a sturdy bag of tortilla chips! Thin, delicate chips might break, so opt for something robust enough to handle the creamy goodness.

Prep Ahead Ideas

You can chop your onion, mince your garlic, and slice your jalapeño a day or two in advance and store them in airtight containers in the fridge. This makes the cooking process incredibly quick when you’re ready to make the dip. While it’s best to grate your own cheese right before melting for the smoothest result, if you’re truly pressed for time, you could pre-shred a block of Monterey Jack or similar, though I’d still recommend freshly cut white American for ultimate smoothness.

Time-Saving Tricks

If you’re in a real hurry, using pre-minced garlic or frozen diced onions can shave off precious minutes. For an even quicker version, you can skip sautéing the aromatics and instead just add a pinch of garlic powder and onion powder directly to the melting cheese, along with a dash of jarred pickled jalapeño for heat and tang. This sacrifices a bit of fresh flavor but still delivers a delicious dip fast.

Common Mistakes

The most common mistake is using too high heat when melting the cheese. This can cause the cheese to separate, become grainy, or even burn to the bottom of the pan. Keep the heat low and stir constantly. Another pitfall is adding cold milk or too much liquid at once, which can shock the cheese and prevent it from melting smoothly. Gradually add warm milk for the best results. Finally, don’t skimp on seasoning; taste as you go and adjust the salt to bring out all those delicious flavors.

What to Serve It With

This queso is fantastic with classic tortilla chips, but don’t stop there! Drizzle it over beef or chicken tacos, enchiladas, burritos, or even a loaded baked potato. It’s also incredible over breakfast potatoes with eggs, or as a decadent sauce for a plate of nachos. Don’t be afraid to spoon it over steamed vegetables for a cheesy, comforting side.

Tips & Mistakes

Storage Tips

Store in airtight containers in the fridge. It reheats beautifully, but if you sneak a bite cold straight from the container, it still works.

Variations and Substitutions

While I truly believe the classic white American cheese provides that iconic restaurant texture, you can certainly experiment. A blend of Monterey Jack and a little cheddar will give you a tangier, slightly more orange queso. For more heat, add an extra jalapeño, a pinch of cayenne pepper, or a dash of your favorite hot sauce. If you want a heartier dip, stir in some cooked, crumbled chorizo or seasoned ground beef. You can also add a can of drained diced green chiles for a mild, earthy flavor. Sometimes, the original is best, but these swaps offer fun ways to personalize it!


Frequently Asked Questions

Why did my queso turn out grainy or oily instead of smooth?
This usually happens when the cheese is melted too quickly over high heat, causing the fats to separate from the solids. Always melt your cheese slowly over low heat, stirring constantly, and add warm milk or half-and-half gradually to maintain a consistent temperature for a perfectly smooth result.

Can I use pre-shredded cheese for this recipe?
While convenient, pre-shredded cheeses often contain anti-caking agents that can prevent them from melting smoothly, potentially leading to a slightly grainy texture. For the best, silkiest queso, I highly recommend buying a block of white American cheese from the deli and shredding or chopping it yourself.

How do I thin out my queso if it becomes too thick?
If your queso is too thick, simply whisk in a tablespoon or two of warm milk or half-and-half at a time, continuing to stir over low heat until it reaches your desired consistency. Be sure to add liquids gradually to avoid making it too thin.

Can I make this queso ahead of time for a party?
You absolutely can! Prepare the queso as directed, then store it in an airtight container in the refrigerator for up to 3-4 days. When ready to serve, reheat gently in a saucepan over low heat, adding a splash of milk to restore its creamy consistency if needed.

MEXICAN RESTAURANT STYLE WHITE CHEESE (QUESO) DIP

MEXICAN RESTAURANT STYLE WHITE CHEESE

A creamy, restaurant-style white queso dip made with Monterey Jack and white American cheeses, jalapeños, and a touch of cream — perfect for chips or drizzling over tacos.
Prep Time 10 minutes
Cook Time 15 minutes
Total Time 25 minutes
Servings 6

Ingredients
  

Main Ingredients

  • 16 oz Monterey Jack cheese, shredded
  • 8 oz White American cheese, cubed
  • 1 cup Heavy cream
  • 2 tbsp Unsalted butter
  • 0.5 cup Yellow onion, diced
  • 2 clove Garlic, minced
  • 2 unit Jalapeño peppers, seeded and finely chopped
  • 4 oz Canned diced green chiles, drained
  • 0.5 tsp Ground cumin
  • 0.25 tsp Cayenne pepper Adjust to taste
  • 1 tsp Kosher salt Or to taste
  • 1 tbsp Fresh lime juice
  • 0.25 cup Fresh cilantro, chopped

Instructions
 

Preparation Steps

  • Prepare ingredients: shred the Monterey Jack, cube the American cheese, dice the onion, mince the garlic, and finely chop the jalapeños and cilantro.
  • In a medium saucepan over medium heat, melt the butter. Add the diced onion and cook until translucent, about 3–4 minutes. Add the minced garlic and chopped jalapeños and cook for another 1–2 minutes until fragrant.
  • Stir in the diced green chiles and heavy cream. Bring the mixture to a gentle simmer, then reduce heat to low.
  • Add the cheeses in small handfuls, stirring constantly until each addition melts and the sauce is smooth. Continue until all cheese is incorporated and the dip is creamy.
  • Season the queso with ground cumin, cayenne, and kosher salt. Taste and adjust seasoning as needed.
  • Remove from heat and stir in fresh lime juice and chopped cilantro. Transfer to a serving bowl and serve warm with tortilla chips or as a topping for tacos.

Notes

For a smoother texture, grate cheeses on the larger hole of a box grater and add them slowly. Keep warm over low heat or in a small slow cooker for serving.
Tried this recipe?Let us know how it was!

AMISH CHICKEN

There’s something incredibly special about a dish that feels like a warm hug, comforting you from the inside out. This Amish Chicken recipe is exactly that—a timeless, hearty meal that brings together tender chicken and wonderfully flavorful vegetables in a rich, creamy sauce. It’s the kind of home cooking that speaks to simplicity, robust flavors, and the joy of sharing a truly satisfying meal. If you’re looking for a fuss-free dinner that delivers big on taste and warmth, this is definitely one to add to your rotation.

My husband, Mike, has a soft spot for anything that reminds him of his grandma’s kitchen, and this Amish Chicken hits all the right notes for him. I remember the first time I made it, a chilly Tuesday evening, and the aroma filling our home was just incredible. He walked in, took a deep sniff, and said, “Now THAT smells like dinner.” He devoured his plate, then asked for seconds, which, let me tell you, is the highest compliment a cook can receive from him. From that moment on, it’s become our go-to for cozy family dinners, especially when we crave something truly nourishing and unfussy after a long day. It’s now one of those dishes that just feels like “us.”

Why You’ll Love This amish-chicken

  • It’s a complete, comforting meal in one dish, making cleanup a breeze and ensuring every bite is packed with savory goodness.
  • The ingredients are simple, wholesome, and easy to find, often staples you already have in your pantry and fridge.
  • The chicken emerges incredibly tender and juicy, bathed in a creamy, herb-infused sauce that perfectly complements the soft, flavorful vegetables.
  • This recipe is wonderfully versatile; you can easily adapt the vegetables or add your favorite herbs to make it uniquely yours.
  • It’s a fantastic make-ahead option or a perfect candidate for leftovers, tasting even better the next day as the flavors meld.

Behind the Recipe

What I’ve really come to appreciate about Amish Chicken is its inherent forgiving nature, yet there are a few small details that truly elevate it. The biggest game-changer for me has been taking the time to properly brown the chicken pieces before they go into the oven. This step isn’t just about color; it builds a foundation of deep, caramelized flavor that permeates the entire dish. Don’t rush it, and don’t overcrowd the pan. Another thing I’ve learned is that while it’s a simple dish, good quality chicken really shines through, as does choosing hearty root vegetables that can stand up to the slow bake without turning to mush. A common stumble for folks is not seasoning the sauce generously enough, so taste and adjust before it goes into the oven. A final flourish of fresh parsley or dill right before serving just brightens everything up beautifully.

Shopping Tips

  • Chicken: Opt for bone-in, skin-on chicken thighs or drumsticks for the best flavor and juiciness. Look for plump, fresh pieces with no discoloration. If you prefer, a whole cut-up chicken works wonderfully too.
  • Potatoes: Yukon Gold or red potatoes are fantastic here because they hold their shape well and get beautifully tender without becoming mealy. Choose firm, blemish-free potatoes of a similar size for even cooking.
  • Vegetables: Select bright, crisp carrots and firm celery stalks. For the onion, a yellow or sweet onion will provide a mellow, aromatic base without being overpowering.
  • Dairy: Heavy cream or half-and-half will create a rich, luxurious sauce. Check the expiration date to ensure freshness, as it’s a key component of the dish’s texture and flavor.
  • Herbs: Fresh parsley or dill makes a world of difference for a bright finish. Look for vibrant green leaves and store them wrapped in a damp paper towel in the fridge.
  • Chicken Broth: A good quality low-sodium chicken broth is essential for the sauce. This allows you to control the seasoning precisely, adding salt to taste without overdoing it.

Prep Ahead Ideas

You can easily get a head start on this comforting meal. Chop all your vegetables (potatoes, carrots, celery, onion) and store them in an airtight container in the fridge for up to 2 days. You can also mix your creamy sauce ingredients together ahead of time and keep them chilled.

Time-Saving Tricks

If you’re really pressed for time, use pre-chopped mirepoix (celery, carrots, onion) from the grocery store. While I usually brown the chicken, you can skip that step in a pinch—though you’ll miss a bit of the depth of flavor. Boneless, skinless chicken thighs or breasts will cook faster, just be mindful not to overbake them.

Common Mistakes

A common pitfall is under-seasoning the sauce; make sure to taste it before baking and adjust salt and pepper as needed. Another mistake is overcrowding the pan when browning the chicken, which steams instead of sears, leading to less flavorful skin. Cook in batches if necessary. Finally, don’t overbake the chicken—use a meat thermometer to ensure it reaches 165°F (74°C) without drying out.

What to Serve It With

This dish is hearty enough to be a complete meal on its own, but it pairs beautifully with a simple green salad with a light vinaigrette to cut through the richness. A crusty loaf of bread or some warm dinner rolls are also excellent for soaking up every last bit of that delicious creamy sauce.

Tips & Mistakes

Storage Tips

Store in airtight containers in the fridge. It reheats beautifully, but if you sneak a bite cold straight from the container, it still works.

Variations and Substitutions

While the classic bone-in chicken is fantastic, you can certainly use boneless, skinless chicken thighs or breasts if that’s what you have on hand; just adjust the cooking time accordingly to prevent drying them out. Feel free to swap out some of the vegetables – parsnips or sweet potatoes would be lovely additions. If you want a slightly different herb profile, a sprig of fresh rosemary or thyme could replace or accompany the parsley. For a dairy-free version, a good quality full-fat coconut milk can create a surprisingly rich and creamy sauce, though the flavor profile will shift slightly. The classic version, though, with its simple, comforting flavors, is often worth sticking to.

Frequently Asked Questions

How do I prevent the chicken from drying out in this recipe?
To keep your chicken juicy, make sure to brown it first to lock in moisture, and then bake it covered for most of the cooking time. Uncover for the last 15-20 minutes to allow the skin to crisp. Always use an instant-read thermometer to ensure the thickest part of the chicken reaches 165°F (74°C) and no higher.

Can I use boneless, skinless chicken thighs or breasts instead?
Absolutely! Boneless, skinless chicken works well, but be aware that it will cook faster. Reduce your baking time by about 10-15 minutes and check for doneness frequently with a thermometer to avoid overcooking. You might also lose a bit of richness without the skin and bones.

What kind of potatoes are best for this dish, and do I need to peel them?
Yukon Gold or red potatoes are ideal because they hold their shape beautifully and become wonderfully tender without getting mushy. Peeling is optional; if you enjoy the rustic texture and added nutrients, leave the skins on, just be sure to scrub them thoroughly.

Can I assemble this Amish Chicken dish ahead of time and bake it later?
Yes, you certainly can! You can assemble the entire dish, minus the final bake, and cover it tightly before refrigerating for up to 24 hours. When you’re ready to bake, let it come to room temperature for about 30 minutes, then bake as directed, potentially adding a few extra minutes to the cooking time.

How can I adjust the thickness of the creamy sauce?
If your sauce is too thin after baking, you can thicken it by removing the chicken and vegetables, then simmering the sauce in a saucepan with a cornstarch slurry (1 tablespoon cornstarch mixed with 1 tablespoon cold water) until it reaches your desired consistency. If it’s too thick, simply stir in a splash more chicken broth or water until it’s perfect.

AMISH CHICKEN

Tender, oven-baked Amish-style chicken that makes its own savory gravy while baking. Simple ingredients and minimal prep for a comforting family meal.
Prep Time 20 minutes
Cook Time 1 hour 30 minutes
Total Time 1 hour 50 minutes
Servings 6
Calories 120 kcal

Ingredients
  

Main Ingredients

  • 4 lb whole chicken cut into 8 pieces
  • 4 tbsp unsalted butter melted
  • 1.5 tsp salt
  • 1 tsp black pepper
  • 1 each onion medium, sliced
  • 3 clove garlic minced
  • 1.5 cup chicken broth low-sodium preferred
  • 1 can cream of chicken soup 10.5 oz can
  • 2 tbsp all-purpose flour for thickening gravy
  • 2 tbsp fresh parsley chopped, for garnish

Instructions
 

Preparation Steps

  • Preheat oven to 375°F (190°C). Pat the chicken pieces dry with paper towels and season all over with salt and black pepper.
  • In a large skillet over medium heat, melt 2 tablespoons of butter. Brown the chicken pieces, skin side down, for 3 to 4 minutes per side until lightly golden. Transfer browned pieces to a large baking dish.
  • In the same skillet, add the remaining butter and sauté the sliced onion until soft, about 4 minutes. Add the minced garlic and cook 30 seconds more.
  • Stir in the cream of chicken soup and chicken broth, scraping up any browned bits from the pan. Whisk in the flour until smooth and simmer 2 minutes to thicken slightly.
  • Pour the sauce evenly over the chicken in the baking dish, covering pieces as much as possible. Cover the dish tightly with foil.
  • Bake covered for 60 minutes. Remove foil and bake an additional 25 to 30 minutes until the chicken is cooked through (internal temperature 165°F) and the gravy is bubbling and slightly thickened.
  • Let the chicken rest 10 minutes before serving. Sprinkle with chopped parsley and serve the chicken with the pan gravy spooned over the top.

Notes

Leftovers keep well refrigerated for up to 3 days. Reheat gently to avoid drying the chicken; add a splash of broth if gravy thickens too much.

Nutrition

Serving: 200gCalories: 120kcalCarbohydrates: 120gProtein: 120gFat: 120gSaturated Fat: 120gPolyunsaturated Fat: 120gMonounsaturated Fat: 120gTrans Fat: 120gCholesterol: 120mgSodium: 120mgPotassium: 120mgFiber: 120gSugar: 120gVitamin A: 120IUVitamin C: 120mgCalcium: 120mgIron: 120mg
Tried this recipe?Let us know how it was!

BAKED GARLIC PARMESAN CHICKEN AND POTATOES

There are few things as comforting and satisfying as a truly delicious one-pan meal, and this baked garlic parmesan chicken and potatoes recipe fits the bill perfectly. It’s a dish that brings together tender, juicy chicken, perfectly roasted potatoes, and the incredible aromatic punch of garlic and savory Parmesan cheese, all cooked together on a single sheet pan. What makes it special is the way the flavors meld as it roasts, creating a cohesive, deeply satisfying dinner with minimal fuss. This is the kind of hearty yet wholesome meal that deserves a permanent spot in your weekly rotation.

My husband, bless his heart, is a man who appreciates a good, no-nonsense dinner after a long day, and this recipe quickly became a superstar in our kitchen. I remember the first time I made it – a particularly chaotic Tuesday evening. I had envisioned a much more elaborate meal, but a last-minute errand meant I needed something fast and forgiving. I threw chicken thighs and chopped potatoes onto a sheet pan, tossed them with olive oil, a generous amount of minced garlic, dried herbs, and a good sprinkle of Parmesan. The aroma that filled our kitchen as it baked was incredible, pulling both my husband and our dog in from different corners of the house. When we finally sat down, tired but happy, the silence at the table, punctuated only by contented sighs, told me everything I needed to know. It was simple, yes, but utterly delicious and immensely comforting. Ever since, it’s been our go-to for busy weeknights, special weeknights, and just about any night we crave that perfect blend of savory chicken, tender potatoes, and garlicky, cheesy goodness.

Why You’ll Love This baked-garlic-parmesan-chicken-and-potatoes

  • It’s a true one-pan wonder, meaning significantly less cleanup, which is always a win in my book after a busy day.
  • The combination of tender chicken, perfectly roasted potatoes, and savory garlic-Parmesan flavors is incredibly satisfying and comforting.
  • This recipe is highly adaptable; you can easily swap in different vegetables or adjust the herbs to suit your family’s preferences.
  • It’s packed with flavor thanks to the generous use of fresh garlic and nutty Parmesan, ensuring every bite is delicious.
  • Ideal for meal prep, the leftovers taste just as good, if not better, making it perfect for quick lunches throughout the week.
  • From start to finish, it’s a relatively hands-off recipe, allowing you to focus on other things while dinner bakes to perfection.

Behind the Recipe

What I’ve really come to appreciate about this dish is how forgiving it is, while still delivering big on flavor. The biggest lesson for me has been to trust the roasting process—don’t be afraid to let those potatoes get a little crispy and the chicken develop a beautiful golden crust. A common trip-up I see is overcrowding the pan; if the chicken and potatoes are piled too high, they steam instead of roast, leading to a softer, less flavorful result. The small touches that truly elevate it are using fresh garlic, not powdered, and a good quality Parmesan. Also, a final sprinkle of fresh parsley or chives right before serving adds a lovely pop of color and a fresh counterpoint to the rich, savory notes. Don’t underestimate the power of seasoning generously before baking, as the flavors mellow somewhat in the oven.

Shopping Tips

  • Chicken: Opt for bone-in, skin-on chicken thighs if you want the juiciest results and a richer flavor, as the skin crisps up beautifully. Boneless, skinless chicken breasts work too, but may cook faster, so adjust accordingly.
  • Potatoes: Yukon Gold or red potatoes are fantastic here because they hold their shape well and get wonderfully tender and slightly creamy inside. Avoid starchy russets if you prefer a less floury texture.
  • Garlic: Look for firm, plump heads of garlic without any green sprouts or soft spots. Freshly minced garlic makes a world of difference compared to jarred.
  • Parmesan Cheese: A block of good quality Parmigiano-Reggiano that you grate yourself will melt and brown much more deliciously than pre-shredded cheese, which often contains anti-caking agents.
  • Herbs: Fresh rosemary and thyme sprigs will infuse the dish with a more vibrant aroma, but dried herbs are a perfectly acceptable pantry staple. Check their freshness by rubbing a little between your fingers – they should still smell potent.
  • Olive Oil: Use a good quality extra virgin olive oil for both flavor and its ability to help the chicken and potatoes crisp up beautifully.

Prep Ahead Ideas

You can significantly streamline your dinner by prepping a few components in advance. Mince all your garlic and chop your potatoes the day before, storing the potatoes in cold water (to prevent browning) and the garlic in a small airtight container in the fridge. You can also mix your herbs with the olive oil and seasonings to create a ready-to-toss marinade. If using chicken thighs, trim any excess fat so they are ready to go.

Time-Saving Tricks

The biggest time-saver here is the sheet pan method itself. To speed things up even more, consider pre-chopped potatoes from the grocery store (though they can be pricier). A garlic press can also make quick work of mincing several cloves. For even cooking and faster roasting, ensure your potato pieces are roughly the same size and not too large. Don’t skip preheating your oven thoroughly; a hot oven is key to achieving that desirable crispy texture quickly.

Common Mistakes

A common mistake is overcrowding the sheet pan. This prevents the chicken and potatoes from roasting properly and instead causes them to steam, resulting in a soggy texture. Use two sheet pans if necessary. Another pitfall is not seasoning generously enough; bland food is easily remedied with proper salt and pepper from the start. Also, try to avoid opening the oven door too frequently, as this drops the temperature and extends cooking time. Finally, ensure your chicken reaches the safe internal temperature of 165°F (74°C) to avoid undercooked poultry.

What to Serve It With

This hearty dish is quite complete on its own, but a simple green salad with a light vinaigrette makes for a lovely fresh contrast. Steamed or roasted green beans, asparagus, or broccoli would also be excellent alongside. A crusty loaf of bread to sop up any leftover garlicky juices is never a bad idea either!

Tips & Mistakes

Storage Tips

Store in airtight containers in the fridge. It reheats beautifully, but if you sneak a bite cold straight from the container, it still works.

Variations and Substitutions

This recipe is wonderfully versatile! For the protein, boneless, skinless chicken breasts or even pork tenderloin cut into medallions would work, though cooking times might need slight adjustment. Feel free to add other sturdy vegetables to the pan, like bell peppers, zucchini, or carrots, keeping in mind that some might cook faster than others. If you’re not a fan of Parmesan, a sharp cheddar or provolone could be interesting, but the nutty, salty classic Parmesan is really worth keeping for its iconic flavor here. For different herbs, a sprinkle of Italian seasoning blend or fresh oregano would be delicious. A squeeze of fresh lemon juice over the top just before serving can brighten all the flavors beautifully.

Frequently Asked Questions

What kind of potatoes work best for roasting?
For this dish, I highly recommend using Yukon Gold, red potatoes, or even small new potatoes. These varieties hold their shape well, develop a lovely crispy exterior, and have a creamy, tender interior when roasted. Avoid starchy russets, as they can become a bit too floury in texture for this particular recipe.

How can I ensure my chicken is juicy and not dry?
To keep your chicken juicy, consider using bone-in, skin-on chicken thighs, which naturally retain more moisture. If using chicken breasts, be careful not to overcook them; a meat thermometer is your best friend here, aiming for 165°F (74°C). Ensuring your oven is properly preheated and not overcrowding the pan also helps the chicken cook efficiently without drying out.

Can I prepare the ingredients ahead of time?
Absolutely! You can chop your potatoes up to a day in advance and store them in a bowl of cold water in the refrigerator to prevent browning. Mince your garlic and prepare your herb mixture as well, storing them separately. This makes assembly on a busy weeknight incredibly quick and easy.

My potatoes aren’t getting crispy. What am I doing wrong?
The most common culprit for non-crispy potatoes is an overcrowded pan. If the potatoes are too close together, they’ll steam rather than roast. Make sure to spread them in a single layer, using two sheet pans if necessary. Also, ensure your oven is fully preheated to the correct temperature and that you’re using enough olive oil to coat them.

BAKED GARLIC PARMESAN CHICKEN AND POTATOES

Tender bone-in chicken thighs roasted with baby potatoes in a garlic-parmesan breadcrumb crust. Easy one-pan dinner with crisped edges, bright parsley, and a savory, buttery sauce.
Prep Time 15 minutes
Cook Time 45 minutes
Total Time 1 hour
Servings 4
Calories 120 kcal

Ingredients
  

Main Ingredients

  • 4 piece bone-in, skin-on chicken thighs
  • 1.5 pound baby potatoes halved if larger than bite-size
  • 2 tablespoon olive oil
  • 4 clove garlic minced
  • 0.5 cup grated Parmesan cheese freshly grated preferred
  • 0.5 cup plain breadcrumbs panko or regular
  • 1 tablespoon Italian seasoning
  • 1 teaspoon kosher salt adjust to taste
  • 0.5 teaspoon ground black pepper
  • 2 tablespoon unsalted butter melted
  • 2 tablespoon fresh parsley chopped, for garnish

Instructions
 

Preparation Steps

  • Preheat the oven to 425 F (220 C). Line a large baking sheet with foil or parchment and set a rack on top if available for crispier skin.
  • In a large bowl, combine olive oil, minced garlic, melted butter, Italian seasoning, salt, and pepper.
  • Add the chicken thighs and potatoes to the bowl and toss until evenly coated with the garlic-oil mixture.
  • In a small bowl mix grated Parmesan and breadcrumbs. Sprinkle the mixture evenly over the tops of the chicken thighs, pressing lightly so it adheres.
  • Arrange the chicken thighs skin-side up on the prepared rack or sheet, placing the potatoes around them in a single layer.
  • Bake for 35 to 45 minutes, until the chicken reaches an internal temperature of 165 F and the potatoes are tender and golden. If needed, broil for 2 to 3 minutes to crisp the topping, watching carefully to avoid burning.
  • Remove from oven and let rest 5 minutes. Garnish with chopped parsley and serve warm.

Notes

For extra flavor, marinate the chicken in the garlic mixture for 1 hour before baking. Leftovers keep well refrigerated for 3 days.

Nutrition

Serving: 200gCalories: 120kcalCarbohydrates: 120gProtein: 120gFat: 120gSaturated Fat: 120gPolyunsaturated Fat: 120gMonounsaturated Fat: 120gTrans Fat: 120gCholesterol: 120mgSodium: 120mgPotassium: 120mgFiber: 120gSugar: 120gVitamin A: 120IUVitamin C: 120mgCalcium: 120mgIron: 120mg
Tried this recipe?Let us know how it was!

FRESH BLUEBERRY CHEESECAKE WITH HOMEMADE CRUST

There’s something truly magical about a classic cheesecake, especially when it’s adorned with the jewel-toned beauty of fresh blueberries and nestled atop a perfectly homemade crust. This isn’t just any dessert; it’s a celebration of simple, wholesome ingredients coming together to create a profoundly satisfying experience. It’s the kind of treat that looks impressive without being overly complicated, offering a creamy, tangy, and sweet symphony of flavors that will have everyone asking for seconds.

My husband, Mark, absolutely adores this fresh blueberry cheesecake. It all started one summer when we had an abundance of blueberries from a local farm, and I was determined to make something spectacular. I’d dabbled in cheesecakes before, but this time, I decided to perfect every element, from the buttery, crumbly crust to the vibrant, fresh blueberry topping. The first time he tried a slice, his eyes lit up, and he declared it “the best cheesecake ever.” Since then, it’s become our traditional summer dessert, marking countless birthdays, anniversaries, and casual Sunday dinners. There’s a comforting rhythm to making it now, a sweet anticipation that fills our kitchen, and it’s a recipe that truly feels like home.

Why You’ll Love This fresh-blueberry-cheesecake-with-homemade-crust

This cheesecake offers an incredible balance of rich creaminess with the bright, natural sweetness of fresh blueberries, making it universally appealing.
The homemade graham cracker crust is buttery, perfectly spiced, and provides a delightful textural contrast to the smooth filling, elevating it far beyond a store-bought version.
It’s surprisingly manageable to make, and while it requires some chill time, the hands-on effort is well worth the show-stopping results.
Beyond its delicious taste, this cheesecake presents beautifully, making it an ideal dessert for special occasions, holidays, or simply to impress guests.
You can easily prepare elements of this cheesecake ahead of time, spreading out the work and making entertaining a breeze.
The recipe uses readily available ingredients, ensuring you can whip up this delightful dessert whenever the craving strikes.

Behind the Recipe

Creating the perfect cheesecake, I’ve learned, is often about patience and attention to detail, not necessarily complex techniques. The biggest revelation for me was ensuring all dairy ingredients are at room temperature; it’s key to achieving that silken, lump-free batter that bakes up incredibly smooth. I also discovered the magic of a water bath – it’s a game-changer for preventing cracks and ensuring an even, gentle bake. Don’t rush the chilling process either; it’s crucial for the cheesecake to set properly and develop its full flavor and texture. And finally, embracing the beauty of fresh, seasonal blueberries for the topping really makes this cheesecake sing, adding that vibrant burst of natural sweetness and a lovely textural contrast.

Shopping Tips

  • Cream Cheese: Always opt for full-fat, brick-style cream cheese for the best flavor and texture. Avoid the whipped or spreadable tubs, as they contain too much water.
  • Blueberries: Look for firm, plump blueberries with a dusty bloom, which indicates freshness. If they’re in season, definitely splurge on fresh; otherwise, frozen can work for the topping, but fresh is superior.
  • Graham Crackers: Choose plain graham crackers for your crust. While cinnamon or honey variations exist, the classic flavor allows the cheesecake and blueberries to shine.
  • Sour Cream/Heavy Cream: Full-fat sour cream adds a wonderful tang and extra creaminess to the cheesecake filling. Heavy cream can also be used in the topping for richness, if desired.
  • Eggs: Large eggs at room temperature integrate more smoothly into the batter, helping prevent overmixing and ensuring a lighter, creamier texture.
  • Lemon: A fresh lemon is indispensable for its zest, which brightens both the cheesecake filling and the blueberry topping, cutting through the richness beautifully.

Prep Ahead Ideas

The graham cracker crust can be fully prepared and baked a day or two in advance. Store it loosely covered at room temperature.
You can make the fresh blueberry topping up to three days ahead. Let it cool completely, then store it in an airtight container in the refrigerator.
Measure out all your dry ingredients for the cheesecake filling and have your cream cheese and eggs come to room temperature the night before.

Time-Saving Tricks

Use a food processor to quickly crush your graham crackers into fine crumbs for the crust – it’s much faster than a rolling pin.
While the cheesecake is baking and cooling, you can prepare your fresh blueberry topping, making efficient use of your kitchen time.
If you’re short on time for chilling, a few hours in the freezer (uncovered) can speed up the process slightly, but be cautious not to freeze it solid unless you intend to store it long-term.

Common Mistakes

Overmixing the cheesecake batter is a common pitfall; it incorporates too much air, which can cause cracks during baking and a less dense texture. Mix only until just combined.
Not chilling the cheesecake long enough before slicing can lead to a messy presentation and a less satisfying texture. Resist the urge to cut it too soon.
Forgetting to use room temperature ingredients can result in a lumpy batter and a less smooth, creamy cheesecake. Plan ahead!
Skipping the water bath often results in cracks on the surface of the cheesecake; it creates a moist, even baking environment.

What to Serve It With

This fresh blueberry cheesecake is magnificent on its own, but a dollop of freshly whipped cream or a small scoop of vanilla bean ice cream makes it even more decadent. A light dusting of confectioners’ sugar adds an elegant touch, or you could garnish with a few extra fresh mint leaves for a pop of color and herbaceous note.

Tips & Mistakes

To ensure a crack-free cheesecake, always bake it in a water bath. Also, allow it to cool slowly in the oven with the door ajar before transferring to the fridge. Don’t overmix the batter to avoid incorporating too much air.

Storage Tips

Store in airtight containers in the fridge. It reheats beautifully, but if you sneak a bite cold straight from the container, it still works.

Variations and Substitutions

While the classic blueberry is a winner, you can easily swap the fruit topping for other berries like raspberries or a mixed berry compote. A swirl of lemon curd or passionfruit puree could be added to the cheesecake batter for an extra layer of bright flavor. For the crust, you could use vanilla wafers or shortbread cookies instead of graham crackers, just adjust the butter amount slightly. However, for a truly iconic dessert, the homemade graham cracker crust with fresh blueberries is hard to beat!

Frequently Asked Questions

How do I prevent my cheesecake from cracking on top?
To prevent cracking, bake your cheesecake in a water bath, which creates a moist baking environment and ensures even, gentle heat. Additionally, allow the cheesecake to cool slowly by turning off the oven and leaving the door ajar for about an hour before transferring it to a cooling rack. Avoid opening the oven door too frequently during baking.

Can I use frozen blueberries for the topping instead of fresh?
Yes, you can absolutely use frozen blueberries for the topping! There’s no need to thaw them beforehand; simply add them directly to your saucepan with the other topping ingredients. Keep in mind that frozen blueberries might release more liquid, so you might need to cook the topping for a minute or two longer until it reaches your desired consistency.

How long does the cheesecake need to chill before it’s ready to serve?
For the best texture and clean slices, your fresh blueberry cheesecake needs to chill for a minimum of 6-8 hours in the refrigerator. Ideally, chilling it overnight allows all the flavors to meld and the cheesecake to set completely, resulting in a much firmer and more enjoyable dessert. Patience is truly key here!

What’s the best way to get clean slices of cheesecake?
For perfectly clean slices, dip a sharp, thin-bladed knife into hot water, wipe it clean, and then make your cut. Repeat this process for each slice: hot water, wipe, cut. This method helps the knife glide through the dense cheesecake without dragging crumbs or sticking, ensuring a beautiful presentation every time.

FRESH BLUEBERRY CHEESECAKE WITH HOMEMADE CRUST

A creamy homemade cheesecake with a buttery graham cracker crust, topped with a bright fresh blueberry compote. Perfect for gatherings or a special dessert.
Prep Time 30 minutes
Cook Time 50 minutes
Total Time 1 hour 20 minutes
Servings 8
Calories 120 kcal

Ingredients
  

Main Ingredients

  • 1.5 cup graham cracker crumbs
  • 2 tablespoon granulated sugar
  • 0.333 cup unsalted butter melted
  • 24 ounce cream cheese room temperature
  • 1 cup granulated sugar
  • 1 cup sour cream room temperature
  • 3 large eggs
  • 2 teaspoon vanilla extract
  • 1 teaspoon lemon zest from 1 lemon
  • 2 cup fresh blueberries plus extra for garnish
  • 0.25 cup granulated sugar for blueberry topping
  • 1 tablespoon cornstarch mixed with 1 tablespoon cold water
  • 1 tablespoon fresh lemon juice
  • 0.25 teaspoon kosher salt

Instructions
 

Preparation Steps

  • Preheat the oven to 325°F (160°C). Grease a 9-inch springform pan and line the bottom with parchment paper.
  • Make the crust: In a bowl combine graham cracker crumbs, 2 tablespoons sugar and melted butter until evenly moistened. Press the mixture firmly into the bottom and slightly up the sides of the prepared pan.
  • Bake the crust for 8 to 10 minutes until set and slightly golden. Remove from oven and let cool while preparing the filling.
  • Prepare the filling: In a large bowl, beat room-temperature cream cheese until smooth. Add 1 cup sugar and the salt, and beat until creamy and well combined.
  • Beat in the sour cream, vanilla extract and lemon zest until smooth. Add the eggs one at a time, mixing just until combined after each addition—do not overmix.
  • Pour the filling over the cooled crust and smooth the top. Place the springform pan on a baking sheet and bake at 325°F (160°C) for 50 minutes, until the edges are set and the center is slightly jiggly.
  • Turn off the oven and crack the door open. Let the cheesecake cool in the oven for 1 hour to minimize cracking, then transfer to a wire rack to cool completely.
  • Make the blueberry topping: In a small saucepan combine 2 cups fresh blueberries, 0.25 cup sugar, lemon juice and the cornstarch slurry. Cook over medium heat, stirring, until the mixture thickens and the berries release their juices, about 4 to 6 minutes. Remove from heat and cool slightly.
  • Once the cheesecake is cooled, spoon the blueberry compote over the top. Chill the cheesecake in the refrigerator at least 4 hours or overnight before serving. Garnish with additional fresh blueberries if desired.

Notes

For best results chill the cheesecake overnight. Store covered in the refrigerator up to 4 days.

Nutrition

Serving: 200gCalories: 120kcalCarbohydrates: 120gProtein: 120gFat: 120gSaturated Fat: 120gPolyunsaturated Fat: 120gMonounsaturated Fat: 120gTrans Fat: 120gCholesterol: 120mgSodium: 120mgPotassium: 120mgFiber: 120gSugar: 120gVitamin A: 120IUVitamin C: 120mgCalcium: 120mgIron: 120mg
Tried this recipe?Let us know how it was!