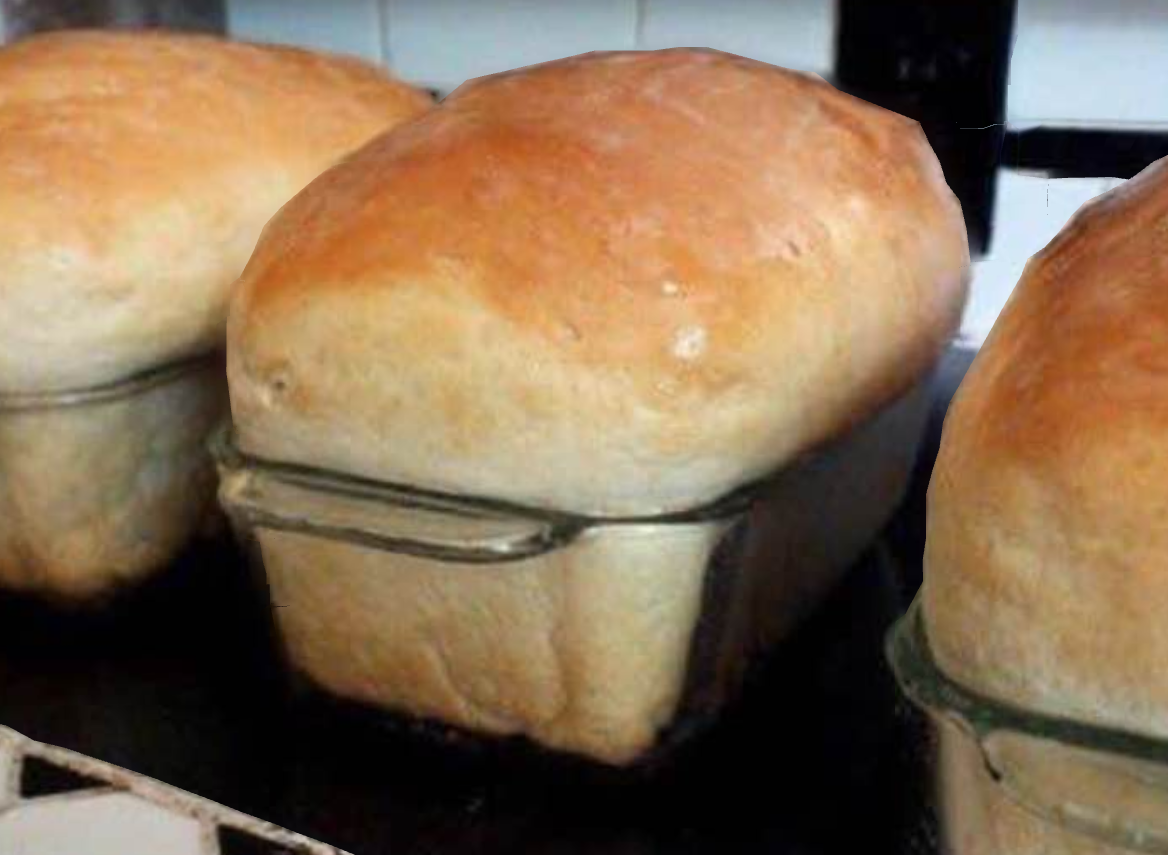
Grandma’s Country White Bread Recipe

There are few things as comforting and truly satisfying as a loaf of warm, homemade bread, and Grandma’s Country White Bread is the epitome of that feeling. This isn’t just any white bread; it’s a simple, honest loaf with a tender crumb, a subtly chewy crust, and an aroma that will transport you straight back to the most cherished kitchen memories. It’s perfect for everything from sandwiches to toast, or simply torn into pieces and savored with butter. If you’ve ever been intimidated by bread making, this recipe is your gentle, encouraging start to a beautiful, lifelong baking journey.
Our home has always been a place where the smell of baking bread signals warmth and love, and this particular recipe has been a star player for years. I remember one blustery Saturday morning when my husband, Mark, came downstairs grumbling about the cold, and I had just pulled a golden loaf of this bread from the oven. The scent instantly changed his mood; he brightened, grabbed a thick slice, and piled it high with butter and jam, declaring it the best antidote to a chilly day. From then on, it became our weekend ritual, a simple pleasure that grounds us and fills our kitchen with a truly special kind of magic.
You may also like:
Why You’ll Love This grandmas-country-white-bread-recipe-2
- It’s incredibly versatile, serving as the perfect base for savory sandwiches, morning toast, or simply alongside your favorite soup.
- The process of making it is wonderfully therapeutic, a rhythmic dance of kneading and rising that brings a sense of accomplishment.
- The aroma alone, as it bakes and fills your home, is worth the effort, creating a cozy and inviting atmosphere.
- It’s a foundational recipe that builds confidence in bread making, with straightforward steps that yield consistent, delicious results.
- The tender, soft crumb and delicate crust are miles better than anything you can buy from a store, truly homemade goodness.
Behind the Recipe
Learning to make bread from scratch was one of my earliest kitchen triumphs, and this country white bread was my gateway. What I’ve really come to appreciate is the subtle dance between yeast and flour, and how patience truly is a virtue. Many people rush the rising process, which is often where the texture can go wrong. Giving the dough ample time to ferment develops flavor and creates that beautiful airy structure. Don’t be afraid to trust your intuition; the dough should feel alive, springy, and light after its rises. A small touch I’ve found that elevates this bread is ensuring your water is just the right temperature for activating the yeast – too hot and you kill it, too cold and it struggles to wake up. Also, a light mist of water or a small pan of hot water in the oven during the first few minutes of baking can help create a wonderful, slightly crispy crust.
Shopping Tips
- Flour: Opt for unbleached all-purpose flour or bread flour. Bread flour has a higher protein content, which can give your loaf a slightly chewier, more structured crumb, but all-purpose works beautifully for a softer texture.
- Yeast: Make sure your active dry yeast or instant yeast is fresh. Check the expiration date on the package, and if you don’t bake often, consider buying smaller packets or storing an opened jar in the fridge to maintain potency.
- Sweetener: Granulated sugar is classic here, as it helps activate the yeast and adds a touch of subtle sweetness to the finished bread. You can use honey or maple syrup as a small substitute for a slightly different flavor profile.
- Fat: Unsalted butter is my preferred choice for richness and flavor, but a neutral oil like canola or vegetable oil can also be used for a slightly lighter loaf. Ensure it’s softened if you’re using butter, for easy incorporation.
- Salt: Standard table salt or fine sea salt works perfectly. Salt is crucial for flavor and also plays a role in controlling yeast activity, so don’t skip it or reduce it too drastically.
Prep Ahead Ideas
You can mix the dough the night before and let it do its first rise in the refrigerator overnight. Just be sure to bring it to room temperature for about 30-60 minutes before punching it down, shaping, and proceeding with the second rise and baking. This slow, cold ferment often develops a deeper, more complex flavor in the bread.
Time-Saving Tricks
If you have a stand mixer with a dough hook, it will do all the kneading work for you in about 8-10 minutes, saving your arms quite a workout. You can also slightly increase the water temperature (up to 110-115°F/43-46°C) to speed up the first rise, but be careful not to make it too hot.
Common Mistakes
A common pitfall is using water that’s too hot or too cold, which impacts yeast activity. Aim for lukewarm, about 105-115°F (40-46°C). Another mistake is not kneading enough; under-kneaded dough results in a dense, crumbly loaf. You’re looking for a smooth, elastic dough that passes the “windowpane test” (stretching a small piece thin enough to see light through it). Lastly, don’t forget to let it proof fully; under-proofed bread will be dense, while over-proofed bread might collapse.
What to Serve It With
This country white bread is divine with homemade jam and butter, alongside a hearty bowl of chili or soup, perfect for grilled cheese sandwiches, as a base for avocado toast, or simply torn and dipped in olive oil and balsamic vinegar.
Tips & Mistakes
Storage Tips
Store in airtight containers in the fridge. It reheats beautifully, but if you sneak a bite cold straight from the container, it still works.
Variations and Substitutions
While the classic version is truly wonderful and worth keeping in your repertoire, you can certainly experiment. For a slightly different flavor, you can swap out 1/4 cup of the all-purpose flour for whole wheat flour, or add a tablespoon of vital wheat gluten to make a chewier loaf. You could also sprinkle the top with sesame seeds or oat flakes before baking for a textural crunch. For a subtle sweetness, a teaspoon of vanilla extract can be added to the dough, particularly if you plan to use it for French toast.
Frequently Asked Questions
Grandma’s Country White Bread Recipe
Ingredients
Main Ingredients
- 6 cups all-purpose flour sifted
- 1.5 cups warm water about 110°F
- 0.5 cups whole milk warmed
- 2 teaspoons instant yeast
- 2 tablespoons granulated sugar
- 1.5 teaspoons salt
- 2 tablespoons unsalted butter softened
- 1 large egg optional, for egg wash
Instructions
Preparation Steps
- In a large bowl, combine warm water, warm milk, and sugar; stir to dissolve.
- Sprinkle the yeast over the liquid, let sit 5 minutes until foamy.
- Add the softened butter and egg to the yeast mixture and mix until combined.
- Gradually add flour and salt, mixing until a shaggy dough forms.
- Turn the dough onto a lightly floured surface and knead for 8–10 minutes until smooth and elastic.
- Place the dough in a greased bowl, cover, and let rise in a warm place until doubled in size, about 60 minutes.
- Punch down the dough, divide into two equal pieces, shape into loaves, and place into greased 9x5-inch loaf pans. Cover and let rise until doubled, about 30 minutes.
- Preheat the oven to 375°F (190°C). If using, brush the tops with beaten egg for a glossy crust.
- Bake for 25–30 minutes until golden brown and the loaves sound hollow when tapped.
- Remove from pans and cool on a wire rack at least 30 minutes before slicing.
Notes
Nutrition
Featured Comments
“This hearty recipe was turned out amazing — the comforting really stands out. Thanks!”
“Made this last night and it was absolutely loved. Loved how the weeknight winner came together.”