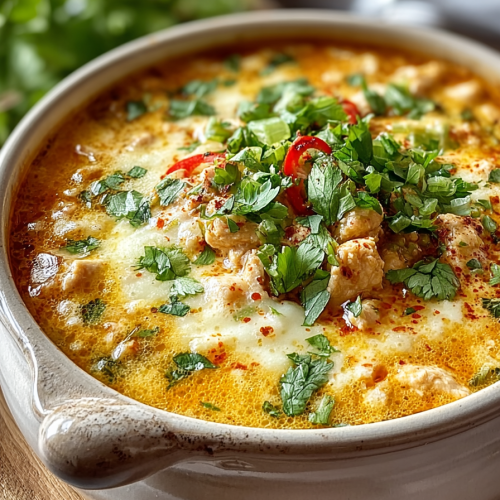
Easy White Chicken Chili Bake
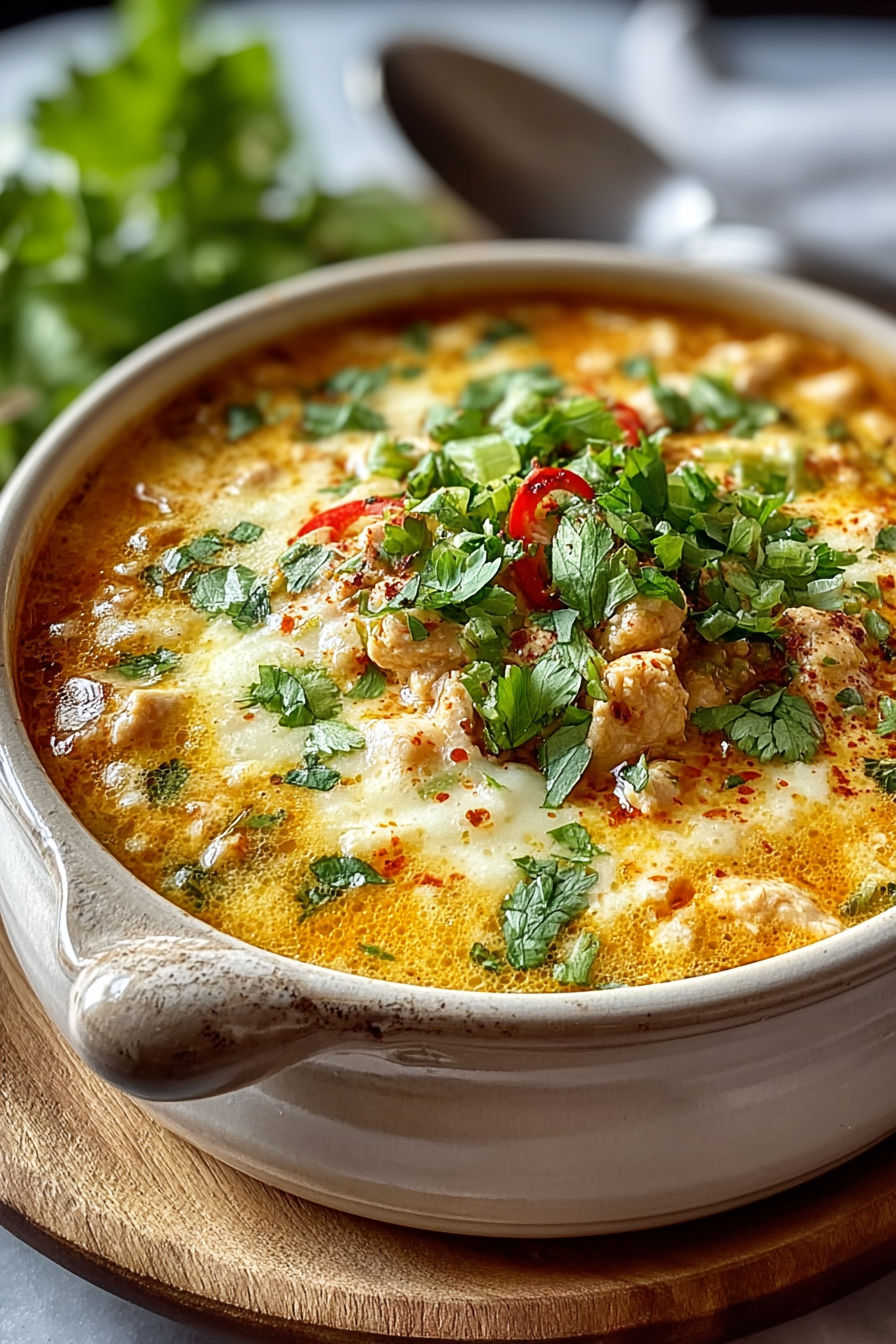
Okay, listen up, friends. My kitchen currently looks like a tornado just discovered a discount spice aisle, and honestly, that’s my natural habitat. But today, we’re cutting through the chaos with something truly glorious: the Easy White Chicken Chili Bake. Think of it as your favorite cozy white chicken chili, but instead of simmering on the stovetop, it gets all snuggled up in a baking dish, crowned with golden, bubbly cheese. It’s warm, it’s creamy, it’s got that little kick, and it’s the kind of comfort food that basically spoon-feeds itself to you. Why should you try it? Because it’s a weeknight miracle, it makes incredible leftovers, and it tastes like you spent hours slaving away when really, you were probably just frantically searching for that missing shoe. No judgment here, just deliciousness.
The first time I made this, my husband, who believes all “chili” must be red and involve a significant amount of beef, looked at it with the suspicion usually reserved for unsolicited political advice. “Is it… white?” he asked, as if I’d committed a culinary felony. He circled the dish like a hungry shark, peering over his reading glasses. The kids, however, had no such qualms. My youngest, bless his sticky little heart, immediately declared it “chicken dip,” proceeded to use an entire bag of tortilla chips to scoop it up, and then asked if we could have “chicken dip night” every night. The ultimate testament? My husband grudgingly admitted it was “surprisingly not soup,” which, from him, is practically a Michelin star review. I even caught him trying to sneak a third helping later that evening, pretending he was just “cleaning up a spilled crumb.” Oh, the lies we tell for good food.
You may also like:
Why You’ll Love This Easy White Chicken Chili Bake
- Reason 1: It’s a literal hug in a baking dish. Like, if comfort food had a spa day, this would be its bathrobe. Creamy, warm, and utterly soul-satisfying.
- Reason 2: Leftovers that are actually *better* the next day. Yes, I said it. The flavors meld, the creaminess intensifies. Future-you will be incredibly grateful for these culinary treasures.
- Reason 3: Less red sauce splatter panic. If you’re like me and your kitchen looks like a crime scene after cooking traditional chili, this white version is your low-drama, high-flavor alternative.
- Reason 4: Feeds a crowd (or one very hungry person for a week). It’s hearty enough for a family dinner, a potluck star, or your personal meal prep savior.
Time-Saving Hacks
- Shortcut: Grab a rotisserie chicken from the grocery store. Seriously, it’s your best friend here. Shred it, dice it, just get that pre-cooked goodness in there.
- Dish-saving hack: Build the creamy chili base in an oven-safe Dutch oven or cast iron pot, then just top it with cheese and pop the whole thing in the oven. Fewer dishes means more Netflix time, people.
- The sneaky “cheat”: Canned white beans and canned diced green chiles are not just allowed, they’re encouraged. We’re going for speed and flavor, not an “I soaked my beans overnight” badge of honor.
Kitchen Confessions
- The disaster story: One time, in my haste, I added an entire can of water instead of broth. It resulted in a sad, soupy mess that tasted like bland sadness. We called it “chili-flavored water” and tried to forget it ever happened.
- A silly mistake: I once got distracted by a cat video (priorities, right?) and put the baking dish directly onto a cold countertop right out of the hot oven. Cue a dramatic “POP!” and a cracked dish. Learn from my ceramic-shattering errors, folks.
- Honest admission: Sometimes I don’t bother rinsing the canned beans quite as meticulously as I should. A quick drain and toss, and into the pot they go. Shhh, don’t tell the food police.
What to Serve It With
Crusty bread for scooping, a big side of easy cornbread, or even just some sturdy tortilla chips for a dip-like experience. A simple green salad with a zesty vinaigrette would be a nice fresh contrast, too. Don’t forget your favorite chili toppings: a dollop of sour cream, a sprinkle of fresh cilantro, or some extra sliced jalapeños for those who like it spicy!
Tips & Mistakes
Tip: Don’t be shy with the cheese on top – it creates that glorious golden crust.
Mistake to avoid: Don’t let the chili get too thick on the stovetop before baking; it will firm up even more in the oven. Keep it a little looser than you think you need initially.
Tip: Let it rest for 5-10 minutes after baking. This helps everything set and makes for easier, less lava-like serving.
Storage Tips
Keep it in the fridge for up to 3-4 days… assuming there’s anything left. Midnight cold bites? Honestly better than fresh. Just scoop a serving into a microwave-safe dish and zap it, or cover and reheat larger portions gently in the oven.
Variations and Substitutions
Swap whatever—honey ↔ sugar, tamari ↔ soy sauce—or skip a step and call it rustic. Still edible. For this bake, feel free to use ground turkey instead of chicken, or even add some sautéed bell peppers for extra veggies and color. If you’re out of white beans, pinto beans work in a pinch, though your “white” chili might take on a more rustic hue. Want more heat? Stir in a pinch of cayenne pepper or an extra jalapeño.
Frequently Asked Questions
Easy White Chicken Chili Bake
Ingredients
Main Ingredients
- 2 cups cooked shredded chicken use rotisserie chicken for convenience
- 1 can white beans drained and rinsed
- 1 cup cream of chicken soup can substitute with homemade
- 1 cup chicken broth low sodium preferred
- 1 cup shredded cheese use Monterey Jack or Pepper Jack for spice
- 1 tsp cumin adds a warm flavor
- 1 tsp chili powder adjust for heat preference
- 1 cup corn fresh or frozen
- 1 cup bell pepper diced, any color
- 1 cup onion finely chopped
Instructions
Preparation Steps
- Preheat your oven to 350°F (175°C).
- In a large bowl, combine shredded chicken, white beans, cream of chicken soup, chicken broth, corn, diced bell pepper, and chopped onion.
- Sprinkle cumin and chili powder over the mixture, then stir until well combined.
- Transfer the mixture into a greased baking dish, spreading it evenly.
- Top with shredded cheese, covering the mixture completely.
- Bake in the preheated oven for 25 to 30 minutes, until the cheese is melted and bubbly.
Notes
Nutrition
Featured Comments
“Super easy and will make again! My family asked for seconds. Saving this one.”
“New favorite here — absolutely loved. tender was spot on.”