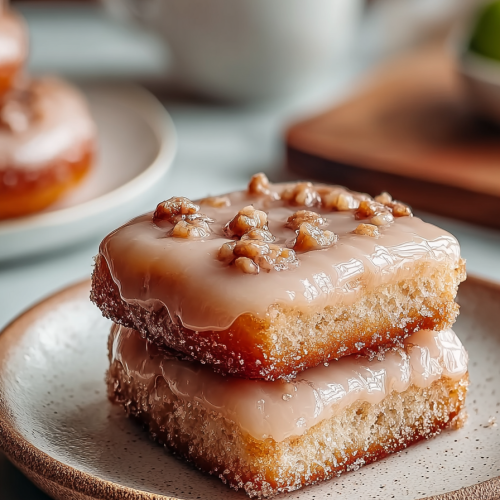
Easy Maple Donut Bars
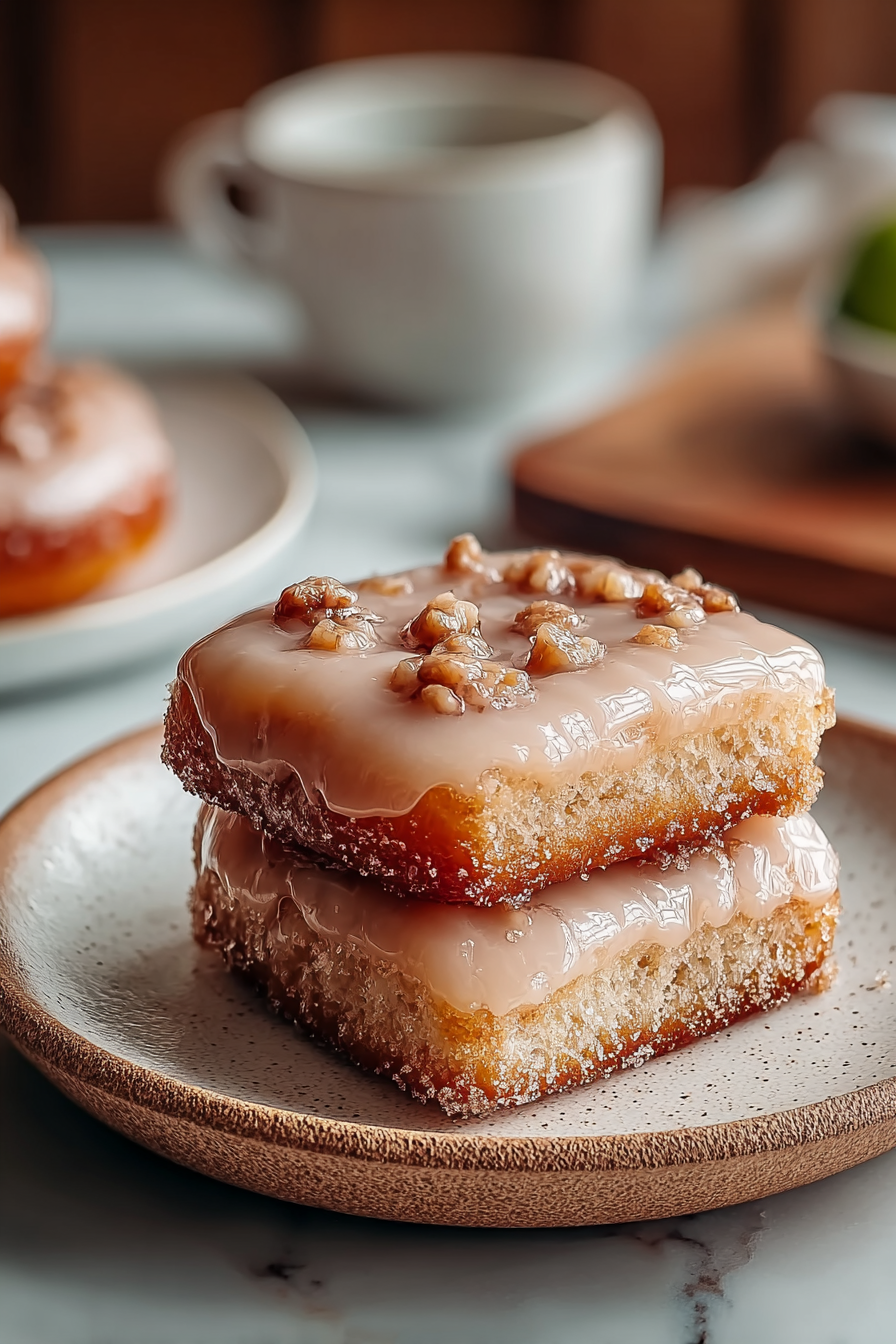
Okay, so I just have to say, if you’re looking for something that screams “I tried, but also I really just wanted dessert *now*,” then honey, you’ve found your jam. Or rather, your Easy Maple Donut Bars. Seriously, it’s like a donut and a sheet cake had a ridiculously delicious baby, and that baby decided it wanted to be super easy to make. No deep-frying, no yeast rising for hours, just pure, unadulterated maple-infused bliss in bar form. Perfect for when you want that cozy, sweet, breakfast-for-dessert vibe without, you know, actually putting in the *donut* effort. Because who has time for that on a Tuesday? Or ever, really?
The first time I whipped these up, it was a Saturday morning, and the house was still, mercifully, quiet. I thought, “Aha! I’ll surprise them with a treat!” Famous last words, right? The smell of warm maple started wafting through the house, and suddenly, my “quiet” house transformed into a stampede of hungry beasts. My husband, bless his heart, emerged from his man-cave, eyes wide, sniffing the air like a bloodhound. “Is that… donuts?” he mumbled, still half-asleep, looking like he’d just wrestled a bear. Then the kids appeared, already sticky, and before I could even slice them neatly, tiny fingers were trying to pry them from the pan. I swear, I had to physically bat them away with a spatula, yelling “Patience, my little vultures!” It was pure chaos, a sticky, syrupy battleground, but hey, at least they loved them. My kids, not the bears, surprisingly.
You may also like:
Why You’ll Love This Easy Maple Donut Bars
- No Frying, All Flavour: Get that classic donut taste without the greasy mess or the fear of setting off the smoke detector. Your fire alarm (and waistline) will thank you.
- Maple Magic: If you’re a sucker for that warm, cozy maple flavour, these bars deliver it in spades, in the cake itself and in the glorious glaze.
- Feeds a Crowd (or just you, no judgment): These bake up in a sheet pan, so you get plenty to share, or to hoard strategically for midnight snacks.
- Surprisingly Simple: We’re talking basic baking here. If you can stir and pour, you can make these. Even I can’t mess this up… usually.
- Breakfast, Snack, Dessert – Pick Your Poison: They’re versatile! Perfect with coffee, a midday pick-me-up, or a sweet end to any meal.
Time-Saving Hacks
- Shortcut that keeps you sane: Use store-bought pancake mix as your dry base. Just make sure it’s plain, then add the other dry ingredients as normal. Boom, fewer ingredients to measure.
- Hack that saves dishes but still looks like effort: Line your baking pan with parchment paper, leaving an overhang on the sides. Once cooled, you can lift the entire slab out, cut it, and glaze it on a cutting board. Zero pan-scraping!
- The sneaky “cheat” you always pull when you’re in a rush: If you’re really pressed for time, use a pre-made cream cheese frosting (the plain kind) and just whisk in a couple of tablespoons of maple syrup and a splash of milk for a quick, decadent maple glaze.
Kitchen Confessions
- The disaster story: I once got *super* enthusiastic with the maple extract. Let’s just say my first batch tasted like I’d accidentally dropped a whole bottle of perfume in the batter. It was so strong, my husband thought I was cleaning the kitchen with floor polish. Learn from my mistake: a little goes a long way!
- A silly mistake you or your family made with this recipe: My youngest, convinced “warm” meant “still actively burning your fingerprints off,” once grabbed a bar straight from the oven. Cue a frantic trip to the sink and a very red, sticky hand. Oven mitts are not optional, kids.
- Honest admission: the messy part you secretly skip: Letting the bars cool *completely* before glazing. I’m an instant gratification person, so I usually drizzle the glaze on when they’re still warm, which means it melts a bit and soaks in, making it more like a maple syrup-soaked cake. It’s not how it’s *supposed* to look, but it’s still undeniably delicious.
What to Serve It With
These Easy Maple Donut Bars are honestly a standalone star, but if you’re feeling fancy, a strong cup of coffee or a glass of cold milk is their perfect companion. For a truly decadent dessert, a scoop of vanilla ice cream melting over a slightly warm bar is pure heaven. Or, you know, just eat them straight from the pan with your bare hands, like my family does. It’s a judgment-free zone here.
Tips & Mistakes
Don’t overmix the batter! A few lumps are fine; overmixing develops gluten and can lead to tough bars. Bake until a toothpick inserted into the center comes out with moist crumbs, not wet batter, but don’t overbake them either, or they’ll be dry. And for the love of all things maple, let them cool a bit before glazing unless you want a completely absorbed, syrupy experience (which, let’s be real, isn’t always a *mistake*).
Storage Tips
Keep it in the fridge… assuming there’s anything left. Midnight cold bites? Honestly better than fresh.
Variations and Substitutions
Swap whatever—honey ↔ sugar, tamari ↔ soy sauce—or skip a step and call it rustic. Still edible. For these bars, try adding a handful of chopped pecans or walnuts to the batter for a little crunch, or sprinkle a tiny bit of flaky sea salt over the maple glaze to really make that sweetness pop. If you’re out of maple extract, a touch of vanilla extract will still be lovely, or simply rely on good quality maple syrup for all your maple notes.
Frequently Asked Questions
Easy Maple Donut Bars
Ingredients
Main Ingredients
- 2.5 cups all-purpose flour Sifted for best results.
- 1 cup granulated sugar
- 0.25 cup unsalted butter Melted and slightly cooled.
- 1 cup milk Whole milk gives a richer flavor.
- 2 large eggs Room temperature preferred.
- 2 tsp baking powder
- 1 tsp vanilla extract For added flavor.
- 0.5 cup maple syrup Use real maple for better taste.
Instructions
Preparation Steps
- Preheat your oven to 350°F (175°C). Grease a 9x13 inch baking pan.
- In a bowl, whisk together the melted butter, sugar, and eggs until well combined.
- Stir in the milk, vanilla extract, and maple syrup into the mixture.
- Gradually add in the flour and baking powder, mixing just until combined.
- Pour the batter into the prepared baking pan and spread evenly.
- Bake for 25 minutes or until a toothpick inserted comes out clean.
- Let cool for a few minutes before slicing into bars.
Notes
Nutrition
Featured Comments
“New favorite here — family favorite. saucy was spot on.”
“Made this last night and it was family favorite. Loved how the vibrant came together.”