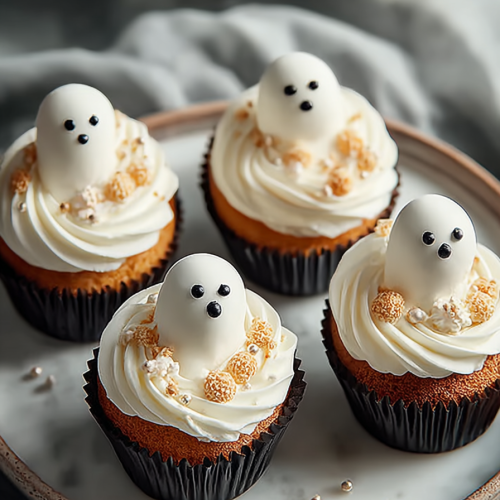
Easy Ghostly Halloween Cupcakes
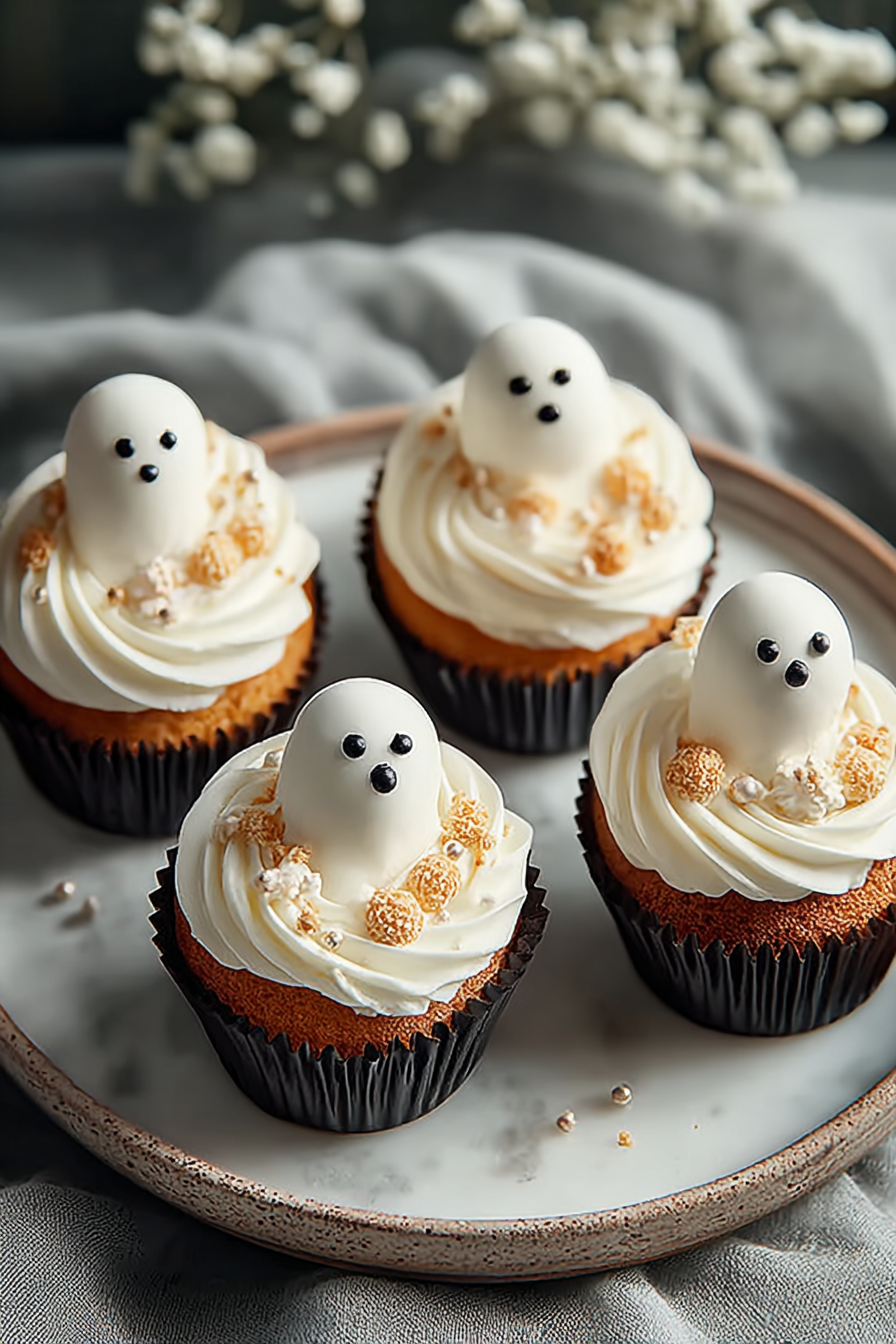
Alright, gather ’round, folks, and pull up a wobbly kitchen stool, ’cause today we’re diving headfirst into the glorious, slightly sticky world of Easy Ghostly Halloween Cupcakes. You know those recipes that *look* like you spent hours painstakingly crafting every spooky detail, but in reality, your biggest effort was opening a box? Yeah, this is *that* recipe. It’s perfect for when you want to impress the neighborhood kids (or, let’s be real, your own inner child) with something adorably ghoulish without, you know, actually losing your mind in a cloud of flour and existential dread. Seriously, if you can operate an oven and a can opener, you’ve got this.
My kitchen is basically a permanent biohazard zone, especially around Halloween. Last year, I attempted these ghosts, and bless his heart, my husband, Mark, decided to “help” by taste-testing every single cupcake *before* they were frosted. We ended up with three ghosts, five headless ghosts, and a tray of plain chocolate muffins. The kids, meanwhile, thought the process of me accidentally splattering white frosting all over the dog was the funniest thing they’d ever seen. “Mommy, the dog is a ghost!” they shrieked, as I tried to gently wipe cream cheese frosting off Buster’s nose. So, yeah, expect chaos, embrace the mess, and maybe lock your significant other out of the kitchen until the decorating stage. You’ve been warned.
You may also like:
Why You’ll Love This Easy Ghostly Halloween Cupcakes
- Effortless Spookiness: Seriously, these look fancy but require about as much culinary skill as making toast. Perfect for tricking people into thinking you’re a domestic goddess.
- Kid-Friendly Fun: Little hands can totally help with the sprinkles and ghost eyes. Just maybe give them a designated “chaos zone” away from your pristine ghost creations.
- Fast & Furious: From zero to hero in under an hour (if you don’t count the twenty minutes you spend looking for the cupcake liners you *just* bought).
- Guaranteed Smiles: Who doesn’t love a cute, edible ghost? Exactly. Even grumpy teenagers crack a smile.
Time-Saving Hacks
- Shortcut that keeps you sane: Store-bought cake mix, always. Don’t even *think* about making it from scratch unless you’ve got a butler.
- Hack that saves dishes but still looks like effort: Use a ziploc bag with the corner snipped off as a makeshift piping bag for the frosting. Less cleanup, more spooky fun.
- The sneaky “cheat” you always pull when you’re in a rush: Pre-made white frosting in a tub. Just whip it up for a few seconds to make it fluffy, and no one will ever know.
Kitchen Confessions
- The disaster story: One year, I tried to decorate them *before* they were completely cool. I ended up with melted, sliding ghosts that looked more like ectoplasm puddles than adorable spirits. Learn from my mistakes, friends.
- A silly mistake you or your family made with this recipe: My youngest once decided the sprinkles were “ghost food” and dumped the entire container onto one cupcake. It became a crunchy, rainbow mound of sugar.
- Honest admission: the messy part you secretly skip: I usually just toss the used cupcake liners and call it a day. Who has time to scrape tiny bits of cake out of them? Not me.
What to Serve It With
Serve these ghostly delights with a tall glass of milk (or wine, depending on your age and stress levels), a classic Halloween movie marathon, and maybe a bowl of popcorn for good measure. They’re also fabulous for a classroom party or just a Tuesday night when you need a little spooky cheer.
Tips & Mistakes
Always make sure your cupcakes are *completely* cooled before you even think about frosting them. I mean, colder than a ghost’s kiss. If they’re warm, that beautiful ghost frosting will turn into a melty, sad mess. Don’t overmix your cake batter; just mix until combined for a light, fluffy cupcake. And for the love of all things spooky, use cupcake liners – trying to grease and flour individual tins is a special kind of hell.
Storage Tips
Keep it in the fridge… assuming there’s anything left. Midnight cold bites? Honestly better than fresh. If you manage to hide a few from the hungry hordes, pop them into an airtight container. They’ll be good for 3-4 days, but honestly, they rarely last past day one.
Variations and Substitutions
Swap whatever—honey ↔ sugar, tamari ↔ soy sauce—or skip a step and call it rustic. Still edible. For these, try different cake mix flavors like red velvet for a bloody ghost effect, or lemon for a zesty spirit! You can also use various sprinkles or edible glitter to give your ghosts different personalities. Don’t have ghost eyes? Use mini chocolate chips or even a dot of black icing gel.
Frequently Asked Questions
Easy Ghostly Halloween Cupcakes
Ingredients
Main Ingredients
- 1.1 cup all-purpose flour
- 0.75 cup granulated sugar
- 0.5 cup pumpkin puree
- 2 large eggs
- 0.5 cup unsalted butter melted
- 2 tsp baking powder
- 1.5 tsp pumpkin pie spice
- 0.25 tsp salt
- 1 cup cream cheese frosting for topping
- 0.5 cup black edible gel for decoration
Instructions
Preparation Steps
- Preheat your oven to 350°F (175°C) and line a cupcake pan with papers.
- In a large bowl, combine flour, sugar, baking powder, pumpkin pie spice, and salt.
- In another bowl, whisk together eggs, pumpkin puree, and melted butter until smooth.
- Pour the wet ingredients into the dry ingredients and mix until just combined.
- Spoon the batter into the cupcake liners, filling each about two-thirds full.
- Bake for 18-20 minutes, or until a toothpick inserted comes out clean.
- Allow the cupcakes to cool before frosting with cream cheese frosting.
- Decorate with black edible gel to create ghost faces.
Notes
Nutrition
Featured Comments
“Made this last night and it was family favorite. Loved how the quick dinner came together.”
“Made this last night and it was absolutely loved. Loved how the fresh came together.”