
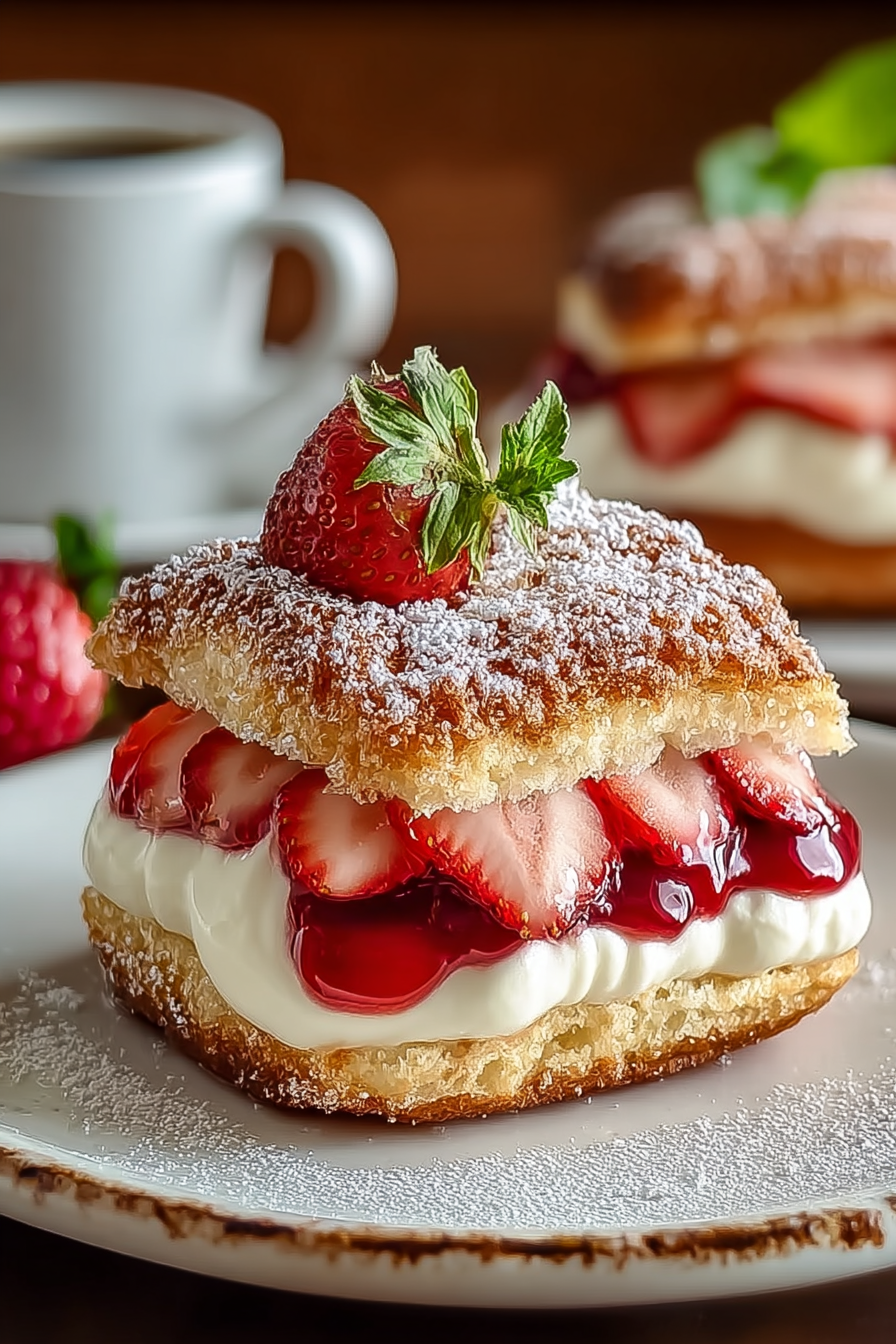
Alright, friends, pull up a wobbly kitchen stool and try not to knock over that pile of clean-ish laundry because today, we’re diving headfirst into something truly decadent and borderline insane: Delish Fried Strawberry Cheesecake Sandwiches. Think of it as French toast had a very passionate, very delicious fling with a strawberry cheesecake, and this glorious creation was their love child. It’s crispy on the outside, gooey, creamy, and bursting with sweet strawberry goodness on the inside. Basically, it’s a breakfast dessert, or a dessert breakfast, or just an excuse to eat cheesecake for every meal. You absolutely need to try it because it’s ridiculously easy to make, shockingly indulgent, and will make you feel like a culinary genius even if your secret superpower is just reheating leftovers.
My husband, bless his heart, acts like a starved grizzly bear whenever these hit the counter. Last time, I swear he hovered over the frying pan like a hawk, demanding “taste tests” which suspiciously involved half of the first batch disappearing before I could even plate them. The kids, meanwhile, are usually too busy squabbling over who gets the biggest strawberry chunk to notice anything, until one bite renders them speechless (a rare and beautiful miracle, let me tell you). I had to hide a plate in the microwave just to get a picture – and even then, I found tiny fingerprints on the glass, clearly indicating a stealth mission had been attempted. We’re talking absolute chaos, but a delicious, sticky, sugar-fueled kind of chaos.
You may also like:
Why You’ll Love This Delish Fried Strawberry Cheesecake Sandwiches
* Because Life Is Short: Why eat a regular sandwich when you can eat one filled with cheesecake and fried to golden perfection? It’s a rhetorical question, don’t answer.
* Cheesecake for Breakfast (or Whenever): This recipe gives you full permission to indulge in cheesecake before noon. You’re welcome.
* Minimal Effort, Maximum Impact: Seriously, you’ll look like a gourmet chef, but the actual elbow grease involved is embarrassingly small. We love a good kitchen optical illusion.
* It’s a Hug on a Plate: Warm, sweet, comforting, and a little bit messy. Just like my actual hugs, probably.
* Kids Will Devour It: And then ask for seconds. And possibly thirds. Prepare for a sugar rush and subsequent crash, but hey, totally worth it.
Time-Saving Hacks
– Shortcut that keeps you sane: Buy pre-sliced brioche or Texas toast. Don’t even *think* about baking your own bread for this. We’re here for shortcuts, not self-inflicted artisanal torture.
– Hack that saves dishes but still looks like effort: Mix your cream cheese filling in a Ziploc bag, snip the corner, and pipe it onto the bread. Less mess, precise application, and you’ll feel like you’re on a fancy cooking show.
– The sneaky “cheat” you always pull when you’re in a rush: Use store-bought strawberry jam or preserves if you don’t have fresh strawberries or can’t be bothered to chop them. I won’t tell a soul.
Kitchen Confessions
– The disaster story: One time, I got a little *too* ambitious with the cream cheese filling, trying to create an extra-thick layer. The moment it hit the hot oil, the bread couldn’t contain the delicious explosion, and a tidal wave of hot, bubbly cheesecake filling erupted. It was a delicious mess, but cleanup required a hazmat suit and a lot of paper towels.
– A silly mistake you or your family made with this recipe: My youngest once tried to “help” by sprinkling powdered sugar on the finished sandwiches… and missed, creating a blizzard of white powder across the entire countertop. Looked like a cocaine bust in my kitchen for a good five minutes.
– Honest admission: the messy part you secretly skip: I often don’t bother with a second plate for the cooked ones. I just pile them directly onto a cooling rack placed over a paper towel-lined baking sheet. Less to wash, more time to eat. Who’s judging? (It’s usually just me, and I forgive myself instantly.)
What to Serve It With
Honestly, these are perfection on their own. But if you’re feeling extra fancy (or just have more sugar cravings), a dollop of whipped cream, a scoop of vanilla ice cream, or a drizzle of maple syrup would not be amiss. A side of fresh fruit (to balance out the fried cheesecake, obviously) is also a good idea.
Tips & Mistakes
Don’t overcrowd your pan – give each sandwich enough space to fry evenly. A medium heat is your friend here; too high and the bread burns before the filling gets warm and gooey. Too low and you’ll end up with greasy, soggy bread. And please, please, seal those edges tight! A fork crimp around the edges of your bread will save you from a cheesy explosion.
Storage Tips
Keep it in the fridge… assuming there’s anything left. Midnight cold bites? Honestly better than fresh.
Variations and Substitutions
Swap whatever—honey ↔ sugar, tamari ↔ soy sauce—or skip a step and call it rustic. Still edible.
For this recipe, you can definitely swap out the strawberries for other berries like blueberries or raspberries. You can also try adding a sprinkle of cinnamon or nutmeg to the cream cheese filling for a little extra warmth.
Frequently Asked Questions

Delish Fried Strawberry Cheesecake Sandwiches
Ingredients
Main Ingredients
- 8 oz cream cheese softened
- 1 cup fresh strawberries sliced
- 1 tsp vanilla extract pure
- 4 slices bread white or brioche preferred
- 1 egg large beaten
- 1 cup all-purpose flour for coating
- 1 cup vegetable oil for frying
- 1 tbsp sugar for dusting
Instructions
Preparation Steps
- In a bowl, mix softened cream cheese, sliced strawberries, and vanilla extract until smooth.
- Spread the cheesecake mixture evenly onto two slices of bread, then top with the remaining slices to form sandwiches.
- Coat each sandwich in flour, dip in beaten egg, then coat with flour again for extra crispiness.
- Heat the vegetable oil in a skillet over medium heat, then fry each sandwich until golden brown, about 3–4 minutes per side.
- Remove from the skillet, dust with sugar, and allow to cool slightly before serving.
Notes
Nutrition
Featured Comments
“Made this last night and it was will make again. Loved how the rich came together.”
“New favorite here — will make again. comforting was spot on.”