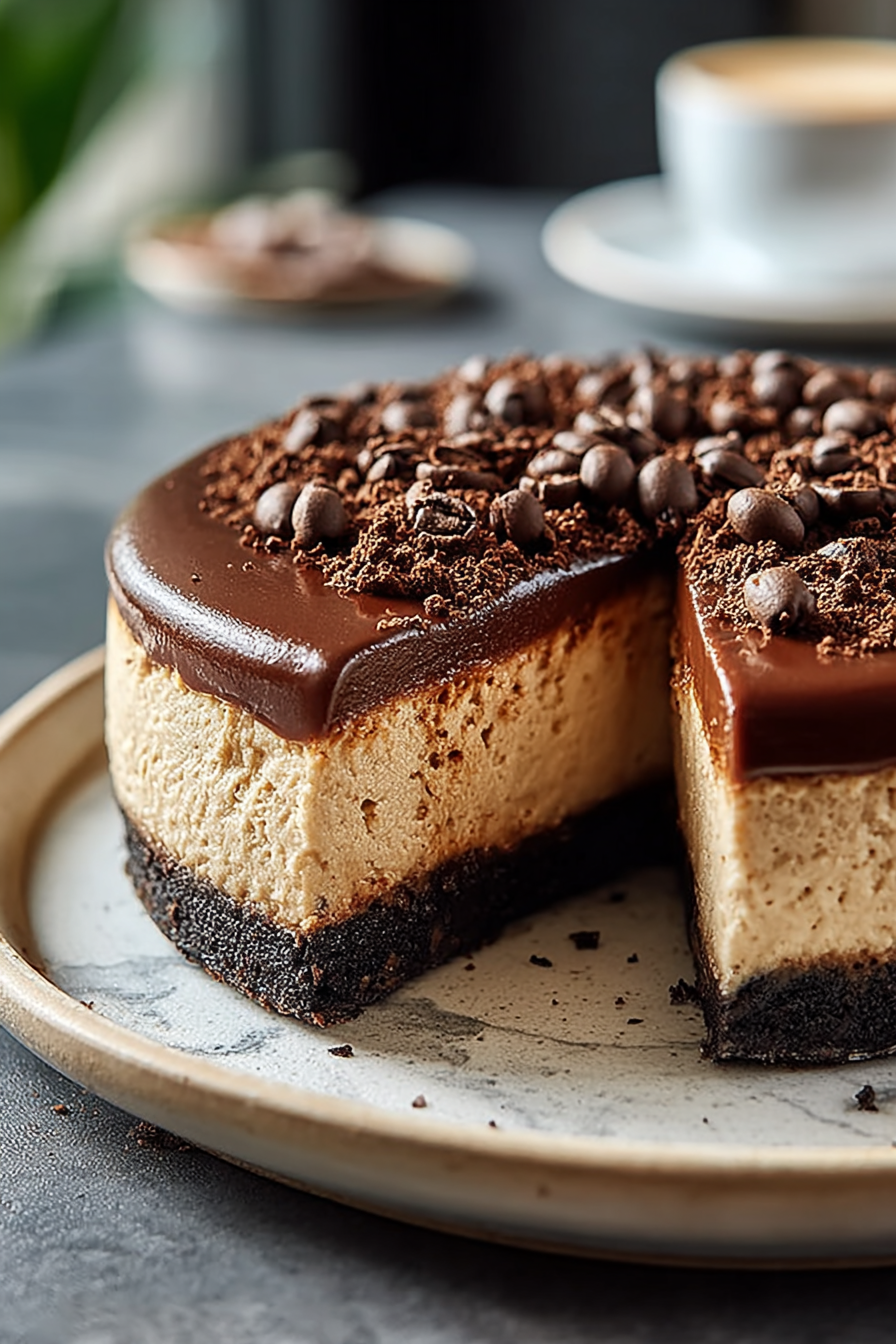
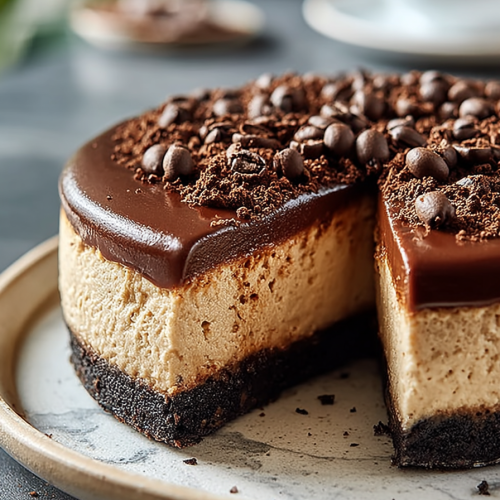
Simply Delicious Espresso Cheesecake
Okay, so I know I promised myself I’d *finally* get to that pile of laundry from… well, let’s just say “last week” to be generous. But then the kids asked for a treat, and honestly, who am I to say no to a good excuse to bake something ridiculously good that makes the whole house smell like a fancy coffee shop? Definitely not me, especially when it involves my new obsession: Simply Delicious Espresso Cheesecake.
My husband, bless his heart, usually just grunts when I put food in front of him, which I’ve learned means “it’s edible, so I’ll eat it all.” But this cheesecake? He actually stopped playing whatever loud video game he was on, took a bite, and mumbled something about “this being dangerous.” That’s high praise, folks. The kids, naturally, thought it was a chocolate cake because “brown equals chocolate,” and devoured their slices, asking if the “coffee stuff” was what made it so good. I didn’t correct them. Some mysteries are best left unsolved, especially when it means they’ll eat something that isn’t neon-colored.
You may also like:
Why You’ll Love This Simply Delicious Espresso Cheesecake
This isn’t just *any* cheesecake; it’s the kind that makes you want to curl up with a good book and pretend your kitchen isn’t still a disaster zone from last night’s dinner.
* Deep Espresso Flavor: It’s got that sophisticated kick without making you feel like you just mainlined a shot from a fancy barista.
* Surprisingly Simple: Despite how impressive it looks, this recipe won’t have you pulling your hair out. We’re going for “effortless gourmet,” not “culinary school dropout.”
* Foolproof for Cheesecake Newbies: If you’ve been intimidated by cheesecakes before, this is your gateway drug. Trust me, I’ve burned toast, so if *I* can do it, you can.
* Perfect for Any Occasion: Birthday? Tuesday? Just survived another trip to the grocery store? This cheesecake is always appropriate.
Time-Saving Hacks
– Sanity Shortcut: Use pre-crushed graham cracker crumbs for the crust. Seriously, who needs another dish to wash or a bag of crumbs exploding all over the counter? Not me, not today.
– Dish-Saving Hack: Instead of separate bowls for your dry and wet ingredients for the filling, just cream the cheese, then add sugar, then eggs, then espresso and vanilla directly into the same bowl. Less mess, still tastes amazing. Your secret is safe with me.
– The Sneaky “Cheat”: Don’t feel like a water bath? Just place a pan of hot water on the rack below your cheesecake. It creates steam, helps prevent cracks, and you don’t have to deal with sloshing water or foil-wrapped springform pans. Shhh.
Kitchen Confessions
– The Disaster Story: Once, I pulled a cheesecake out of the oven, admired its perfect golden top for a whole 30 seconds, then promptly tripped over the dog and nearly face-planted, resulting in the cheesecake doing a rather spectacular belly flop onto the floor. The dog looked regretful. I cried a little. We ordered pizza.
– A Silly Mistake: My youngest once tried to “help” by adding a *whole other tablespoon* of instant espresso powder to the batter. The resulting cheesecake was… intense. Like, “wake-you-up-at-3-AM-just-by-smelling-it” intense. Delicious for hardcore coffee lovers, but definitely not for the faint of heart.
– Honest Admission: I totally skip greasing the sides of the springform pan. It helps the cheesecake cling to the sides as it cools, preventing those annoying cracks. Less work, better results – that’s my kind of baking.
What to Serve It With
Honestly, this Simply Delicious Espresso Cheesecake is a star all on its own. But if you want to be extra, a dollop of fresh whipped cream (lightly sweetened, please!), a sprinkle of cocoa powder, or a few chocolate-covered espresso beans really elevate the experience. For a truly decadent moment, a small glass of Kahlúa or an after-dinner coffee makes it perfect.
Tips & Mistakes
Don’t Overmix! Overmixing the batter after adding the eggs is the express lane to a cracked cheesecake. Mix just until combined.
Cool It Slowly: Let it cool in the oven with the door ajar for an hour after baking, then on the counter, then in the fridge. This gradual cooling is key to preventing cracks. Patience is a virtue, especially when cheesecake is involved.
Room Temp Ingredients: Make sure your cream cheese and eggs are at room temperature. It makes for a smoother, lump-free batter. No one wants lumpy cheesecake.
Storage Tips
Keep it in the fridge… assuming there’s anything left. Midnight cold bites? Honestly better than fresh. This cheesecake will last perfectly covered in the fridge for 4-5 days. It actually gets even better the next day as the flavors meld.
Variations and Substitutions
Swap whatever—honey ↔ sugar, tamari ↔ soy sauce—or skip a step and call it rustic. Still edible. For this espresso cheesecake, you could swirl in some melted dark chocolate for a mocha version, or swap out the graham cracker crust for an Oreo crust for a different twist. If you’re out of espresso powder, strong brewed coffee (cooled!) can work, just reduce some of the other liquid in the recipe slightly to keep the consistency.
Frequently Asked Questions
Simply Delicious Espresso Cheesecake
Ingredients
Main Ingredients
- 1.2 cups graham cracker crumbs
- 4 oz unsweetened chocolate
- 0.75 cup unsalted butter
- 16 oz cream cheese
- 1 cup granulated sugar
- 3 large eggs
- 0.5 cup sour cream
- 2 tbsp espresso powder
Instructions
Preparation Steps
- Preheat the oven to 325°F (163°C).
- Melt the chocolate and butter in a saucepan over low heat, stirring until smooth.
- Combine the graham cracker crumbs with melted chocolate mixture. Press firmly into a 9-inch springform pan.
- In a large mixing bowl, beat the cream cheese until creamy. Gradually add sugar until well combined.
- Add the eggs, one at a time, mixing well after each addition. Incorporate the sour cream and espresso powder.
- Pour the filling over the crust. Bake for about 60 minutes or until set.
- Cool on a wire rack, then refrigerate for at least 4 hours before serving.
Notes
Nutrition
Featured Comments
“Super easy and will make again! My family asked for seconds. Saving this one.”
“Made this last night and it was turned out amazing. Loved how the cheesy came together.”