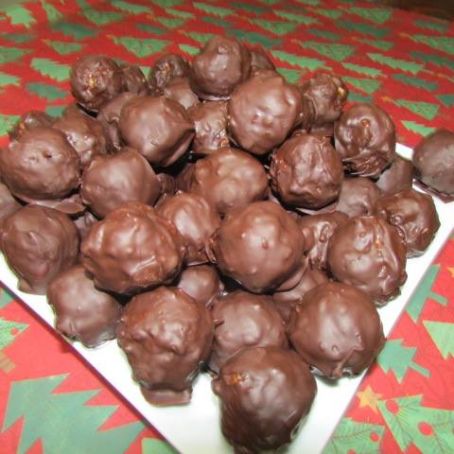
PINEAPPLE COCONUT SNOWBALLS
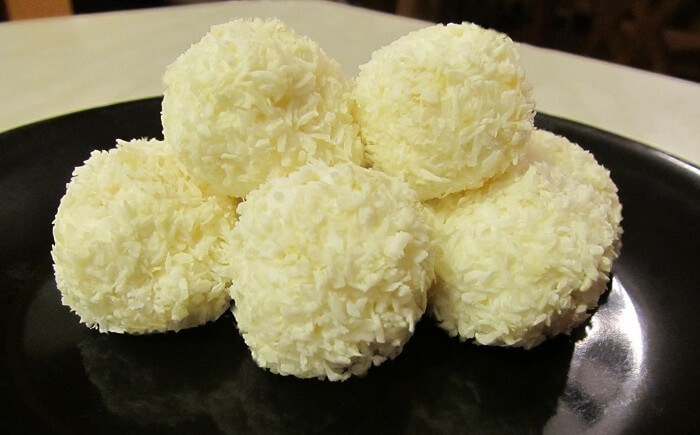
These pineapple coconut snowballs are the simplest, most delightful little tropical treats you can imagine. Imagine the sweet, tangy burst of pineapple, blended harmoniously with the creamy richness of coconut, all rolled into a bite-sized, snow-dusted package. They’re a no-bake wonder, coming together with minimal effort but delivering maximum flavor, making them the perfect pick-me-up on a warm day or a sweet escape any time you need a taste of the tropics.
My husband, bless his sweet tooth, absolutely adores these. I first whipped them up years ago for a summer potluck, hoping for a light dessert amidst all the heavy barbecue. They vanished so quickly, I barely got one myself! He kept asking for “those little coconut things” every week until I made them a regular fixture. Now, they’re our go-to for a quick dessert when we’re craving something sweet but don’t want to turn on the oven. We even involve our little one in the rolling; it’s a fun, sticky activity that always ends with happy smiles and a delicious reward. They truly bring a little bit of sunshine into our home.
You may also like:
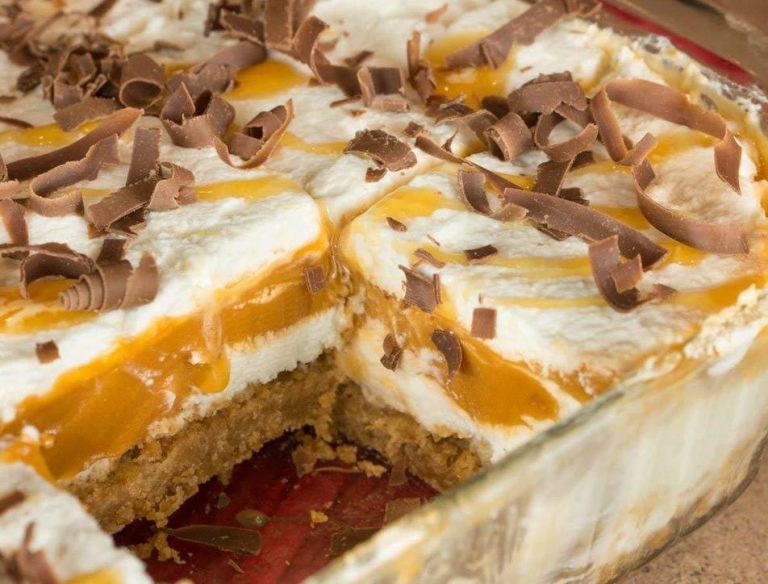
- Very Moist Coconut Sheet Cake
- SUPER-SECRET RECIPE FOR THE BEST TASTING PINEAPPLE UPSIDE DOWN CAKE EVER
- COCONUT CAKE WITH RASPBERRY FILLING
- CREAMY LEMON SQUARES – One of my favorite desserts of all time!
- MINI STRAWBERRY CHEESECAKE TACOS
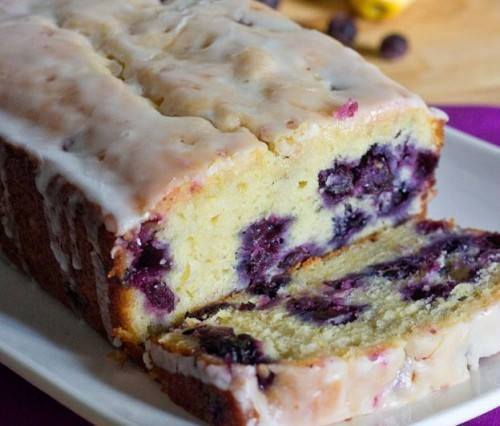
- Country Apple Fritter Bread – Now You Can Have Your Fritters And Sweet Bread At The Same Time!
Why You’ll Love This pineapple-coconut-snowballs
- Taste of the Tropics: Each bite transports you to a sunny beach with the vibrant flavors of pineapple and coconut. It’s a bright, refreshing taste that feels like a mini-vacation.
- Effortlessly Easy & No-Bake: Forget the oven! This recipe requires no baking whatsoever, making it perfect for hot days or when you just want a simple, fuss-free dessert.
- Kid-Friendly Fun: The simple mixing and, especially, the rolling process are fantastic for getting little hands involved in the kitchen. It’s a sweet reward for their participation!
- Perfect for Sharing: These snowballs are ideal for potlucks, parties, or gifting. They’re easy to transport and always a crowd-pleaser, disappearing quickly from any dessert spread.
- Make-Ahead Magic: You can prepare the mixture ahead of time and chill it, making assembly a breeze right before you need them. They also store wonderfully, so you can enjoy them for days.
- Naturally Gluten-Free (and easily dairy-free): With just a few simple ingredient checks, these can be a delightful treat for those with dietary restrictions, offering a sweet option without compromise.
Behind the Recipe
What I’ve learned most about making these is that patience with chilling is your best friend. The mixture can seem quite sticky initially, but a good, solid chill in the fridge transforms it into something perfectly pliable for rolling. Don’t rush that step! The secret to truly elevating these snowballs lies in a couple of small touches. Firstly, using good quality sweetened condensed milk really makes a difference in the creaminess. Secondly, a tiny pinch of salt in the mixture helps to balance the sweetness and brings out the fruity notes of the pineapple even more. And if you’re feeling extra, a quick toast of a small portion of your shredded coconut for garnish adds a beautiful visual and textural contrast. Don’t be afraid to squeeze out a little extra liquid from the pineapple—it helps with the consistency.
Shopping Tips
- Crushed Pineapple: Look for canned crushed pineapple packed in 100% juice, not heavy syrup. Draining it very well is key to the snowball’s texture, so a good quality, well-drained can is essential.
- Sweetened Shredded Coconut: While you can use unsweetened, the sweetened variety offers a nice chewiness and contributes to the overall sweetness and moisture of the snowballs.
- Sweetened Condensed Milk: Any standard brand of full-fat sweetened condensed milk will work beautifully. This is a primary binder and sweetener, so don’t substitute with evaporated milk.
- Vanilla Extract: A good quality pure vanilla extract enhances the tropical flavors. If you can find a coconut extract, a tiny dash of that could also be lovely for an extra boost.
- Powdered Sugar: This is for the outer coating, giving them their “snowball” look. Ensure it’s fresh and lump-free for a smooth, even finish.
- Optional Zest: If you want to add a bright, zesty kick, pick up a fresh lime or lemon. The zest provides a wonderful counterpoint to the sweetness.
Prep Ahead Ideas
You can prepare the entire pineapple-coconut base mixture a day or two in advance. Once mixed, cover it tightly and refrigerate. This not only allows the flavors to meld beautifully but also ensures the mixture is perfectly firm and easy to roll when you’re ready.
Time-Saving Tricks
The biggest time-saver here is leaning into the no-bake aspect! Beyond that, make sure your crushed pineapple is well-drained right from the start to avoid a watery mixture that takes longer to set. Using a small cookie scoop for consistent sizing speeds up the rolling process considerably.
Common Mistakes
A common pitfall is not draining the crushed pineapple sufficiently. Too much moisture will result in a sticky, loose mixture that’s hard to roll and won’t hold its shape. Another mistake is not chilling the mixture long enough; patience here prevents a sticky mess. Lastly, some people roll them too loosely, causing them to crumble; a firm, gentle press is best.
What to Serve It With
These pineapple-coconut-snowballs are fantastic on their own as a light, refreshing dessert. They also pair wonderfully with a simple cup of coffee or a glass of iced tea. For a festive spread, serve them alongside other tropical treats like mango sorbet or a fruit platter.
Tips & Mistakes
Storage Tips
Store in airtight containers in the fridge. It reheats beautifully, but if you sneak a bite cold straight from the container, it still works.
Variations and Substitutions
While the classic version is truly delightful, don’t hesitate to play with flavors. A little lime zest folded into the mixture or sprinkled over the finished snowballs adds a lovely, bright tang. You could also roll them in toasted shredded coconut for a nuttier flavor and textural contrast instead of, or in addition to, powdered sugar. For a grown-up twist, a tiny splash of rum extract or even a tablespoon of actual rum in the mixture can add a delicious depth. For a nuttier snowball, finely chopped macadamia nuts could be mixed into the base.
Frequently Asked Questions
PINEAPPLE COCONUT SNOWBALLS
Ingredients
Main Ingredients
- 1 cup crushed pineapple, well drained Finely chopped and drained to remove excess liquid
- 2 cups shredded unsweetened coconut
- 0.5 cup sweetened condensed milk Helps bind the mixture; add more if needed
- 1 teaspoon vanilla extract
- 0.25 teaspoon salt
- 6 ounces white chocolate, chopped (optional for coating) Melt for dipping if desired
- 0.5 cup extra shredded coconut for rolling
Instructions
Preparation Steps
- Drain the crushed pineapple thoroughly in a fine mesh sieve, pressing lightly to remove excess liquid. If pieces are large, chop finely.
- In a medium bowl, combine the drained pineapple, shredded coconut, sweetened condensed milk, vanilla extract, and salt. Mix until the mixture is sticky and holds together. If too wet, add a little more shredded coconut; if too dry, add a touch more condensed milk.
- Using a tablespoon or small cookie scoop, form the mixture into 12 evenly sized balls and place them on a parchment-lined tray.
- Chill the formed balls in the refrigerator for at least 30 minutes to firm up.
- Optional: Melt the white chocolate in a heatproof bowl over simmering water or in 20-second intervals in the microwave, stirring until smooth. Dip each chilled ball halfway into the melted chocolate, then return to the parchment.
- While the chocolate is still wet (or directly for uncoated), roll each ball in the extra shredded coconut to coat. Return to the refrigerator until the chocolate sets or the balls are firm.
- Store the snowballs in an airtight container in the refrigerator for up to 5 days or freeze for up to 1 month. Thaw in the fridge before serving.
Notes
Featured Comments
“New favorite here — will make again. crowd-pleaser was spot on.”
“Impressed! Clear steps and family favorite results. Perfect for busy nights.”