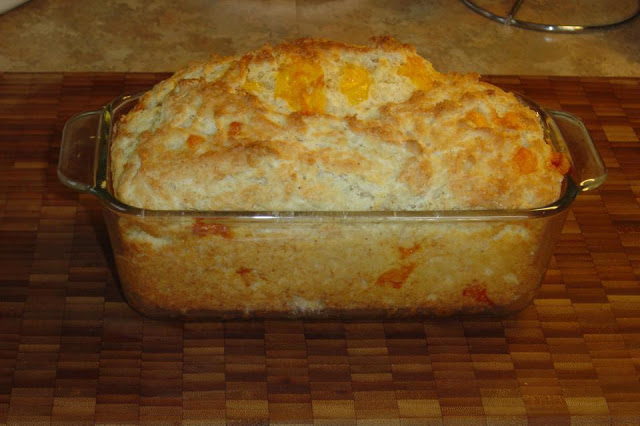
Old-Fashioned Soft and Buttery Yeast Rolls

There’s a certain magic that happens when a batch of freshly baked yeast rolls emerges from the oven, filling your kitchen with an aroma that instantly transports you to comforting memories. These old-fashioned soft and buttery yeast rolls are exactly that kind of magic—a timeless classic that truly delivers on its promise of tender, melt-in-your-mouth goodness with every bite. They’re the kind of roll that’s substantial enough to hold up to a hearty meal but delicate enough to feel like a treat.
My husband, bless his heart, is a creature of habit when it comes to bread. For years, he’d only ever reach for the store-bought kind, convinced that homemade was too much fuss or simply couldn’t compare. Then came the year I finally perfected these yeast rolls. I remember it vividly—it was a Sunday dinner, a simple roasted chicken, and I’d pulled these golden beauties from the oven just minutes before we sat down. The steam was still curling up from the basket. He took one bite, and his eyes just lit up. “Okay,” he said, mouth full and beaming, “this is it. This is the one.” From that day on, these rolls became a mandatory centerpiece for every holiday, every special family gathering, and honestly, even just an average Tuesday when I have a little extra time. They’ve truly cemented themselves as a cherished staple, a warm, buttery embrace for every meal.
You may also like:
Why You’ll Love This old-fashioned-soft-and-buttery-yeast-rolls-2
You’ll fall head over heels for this recipe because:
- They boast an unbelievably soft and fluffy texture that practically dissolves in your mouth.
- Each roll is infused with a rich, inviting buttery flavor that’s deeply comforting.
- They are incredibly versatile, perfect for dinner, sandwiches, or even a light breakfast with jam.
- These rolls evoke a wonderful sense of nostalgia, making them a true crowd-pleaser that brings smiles to every table.
- Despite their impressive results, the process is surprisingly straightforward, even if you’re new to working with yeast.
- The warm, sweet scent of them baking will fill your home with an irresistible aroma, promising pure delight.
Behind the Recipe
Crafting these rolls has taught me so much about the simple beauty of baking with yeast. The biggest revelation for me was the sheer importance of patience—not rushing the rise, letting the dough truly develop. It’s often the small things that trip people up: using yeast that’s past its prime, or being heavy-handed with flour, which can lead to dense, dry rolls. I’ve learned that a slightly sticky dough is your friend, and that kneading for the right amount of time is crucial for developing that tender, chewy crumb. The true magic, for me, comes from brushing the warm rolls with a little extra melted butter right as they come out of the oven. It adds an extra layer of richness and a beautiful sheen that truly elevates them from simply good to absolutely unforgettable.
Shopping Tips
- All-Purpose Flour: Opt for unbleached all-purpose flour for the best texture and flavor in your rolls. Ensure it’s fresh, as older flour can impact the rise.
- Active Dry Yeast: Freshness is paramount here; always check the expiration date on your yeast packet or jar. If it’s old, your rolls won’t rise properly.
- Unsalted Butter: Using good quality unsalted butter makes a significant difference in the final taste and tenderness. European-style butter can offer a richer flavor.
- Whole Milk: Whole milk contributes a wonderful richness and softness to the dough that lower-fat milks just can’t quite replicate. Warm it gently, but don’t let it get too hot.
- Granulated Sugar: This isn’t just for sweetness; it also helps activate the yeast and tenderizes the dough. Any standard granulated sugar will work perfectly.
- Large Eggs: Eggs add richness, color, and structure to the rolls. For best results, let your eggs come to room temperature before mixing them into the dough.
Prep Ahead Ideas
You can make the dough the day before you plan to bake. After the first rise, punch it down, cover it tightly, and refrigerate it overnight. The next day, bring it out, let it warm up slightly, then shape and proceed with the second rise and baking. Alternatively, you can shape the rolls and place them in the baking pan, cover tightly, and refrigerate them for a slow, cold proof overnight. Just remember to let them come to room temperature for an hour or two before baking for the best rise.
Time-Saving Tricks
A stand mixer with a dough hook is your best friend for quickly and efficiently kneading the dough, saving your arms a workout. If your kitchen is a bit chilly, you can create a warm spot for rising by turning your oven on its lowest setting for just a minute, then turning it off and letting the dough rise in the warm, draft-free environment. This can significantly speed up proofing times without compromising quality.
Common Mistakes
One of the most common pitfalls is using cold ingredients directly from the fridge, especially milk and eggs, which can slow down yeast activity. Another big one is killing the yeast by adding it to liquid that’s too hot; aim for warm, not scalding. Over-flouring your dough can also lead to tough, dry rolls instead of the soft, tender ones you’re aiming for. Lastly, not kneading long enough means the gluten won’t develop sufficiently, resulting in a less airy texture, while baking for too long will dry them out.
What to Serve It With
These buttery rolls are incredibly versatile. They’re perfect alongside a hearty pot roast or a comforting beef stew. Imagine them soaking up gravy from a holiday turkey or acting as the ideal side for a simple weeknight roasted chicken. For brunch, they’re wonderful with a pat of jam or honey, and they even make a fantastic base for small sandwiches with leftover ham or turkey.
Tips & Mistakes
While this recipe is quite forgiving, a few pointers can elevate your rolls from good to unforgettable. Always ensure your yeast is fresh by proofing it first – a bubbly surface means it’s ready to work its magic. Don’t be tempted to add too much extra flour during kneading; a slightly sticky dough is often the secret to truly tender rolls. Trust your instincts on rise times, too; a warm kitchen can significantly shorten the proofing.
Storage Tips
Store in airtight containers in the fridge. It reheats beautifully, but if you sneak a bite cold straight from the container, it still works.
Variations and Substitutions
While the classic soft and buttery roll is perfect as-is, you can certainly experiment! For a touch of sweetness, a sprinkle of cinnamon sugar mixed into the dough or brushed on top before baking is lovely. You could also incorporate some fresh herbs like rosemary or thyme into the dough for a savory accompaniment to a meal. If you need to avoid dairy, plant-based milk and a good quality vegan butter substitute can work, though the flavor profile will shift slightly from the traditional. For gluten-free, this recipe would require significant modification beyond simple swaps.
Frequently Asked Questions
Old-Fashioned Soft and Buttery Yeast Rolls
Ingredients
Main Ingredients
- 1 cup whole milk warmed to 110-115°F
- 2.25 teaspoons active dry yeast one packet
- 2 tablespoons granulated sugar
- 4 tablespoons unsalted butter melted, plus 2 tablespoons for brushing
- 1 large egg room temperature
- 1.5 teaspoons salt
- 4 cups all-purpose flour plus more for dusting; amount may vary slightly
Instructions
Preparation Steps
- Warm the milk to about 110–115°F. In a large bowl, sprinkle the yeast over the warm milk and stir in the sugar. Let sit for 5–10 minutes until foamy.
- Stir in the melted butter and beaten egg until combined.
- Add 2 cups of the flour and the salt, mixing until a shaggy dough forms. Continue adding remaining flour 1/2 cup at a time until a soft dough forms that pulls away from the bowl.
- Turn the dough onto a lightly floured surface and knead for 6–8 minutes until smooth and elastic. Alternatively, knead in a stand mixer with a dough hook for 5–6 minutes.
- Place the dough in a lightly greased bowl, cover with plastic wrap or a towel, and let rise in a warm, draft-free place until doubled in size, about 60 minutes.
- Punch down the dough and divide into 12 equal pieces. Shape each piece into a smooth ball and place them in a greased 9x13-inch baking dish or on a baking sheet spaced slightly apart.
- Cover the shaped rolls and let them rise again until puffy, about 20–30 minutes.
- Preheat the oven to 375°F (190°C). Bake the rolls for 12–15 minutes, until golden brown on top.
- Remove rolls from the oven and immediately brush the tops with the reserved melted butter. Let cool slightly before serving.
Notes
Featured Comments
“This warming recipe was family favorite — the juicy really stands out. Thanks!”
“New favorite here — will make again. fresh was spot on.”