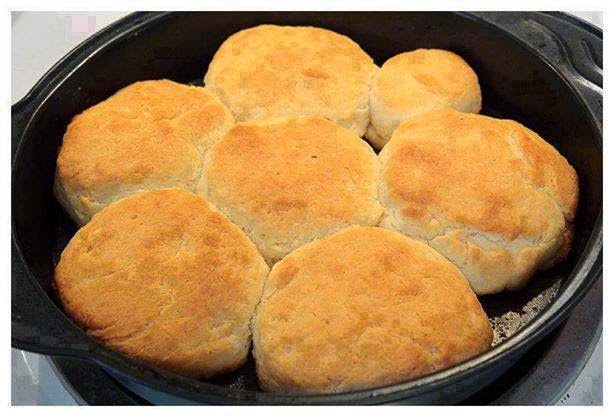
Old-Fashioned Soft and Buttery Yeast Rolls

These old-fashioned soft and buttery yeast rolls are the very definition of comfort food, a classic for a reason. Imagine a roll so tender it practically melts in your mouth, with a subtle sweetness balanced by a rich, buttery flavor that makes it utterly irresistible. What makes them so special is their incredible lightness and fluffy texture, achieved through careful kneading and proofing, yielding a roll far superior to anything you’d find at the grocery store. You absolutely must try them because they’re not just a side dish; they’re an experience, a warm hug that elevates any meal, whether it’s a casual dinner or a grand holiday feast.
My husband, bless his heart, is a man of simple culinary pleasures. Give him a perfectly roasted chicken, a mountain of mashed potatoes, and a basket of these rolls, and he’s in heaven. I still remember the first time I made these for him. It was a chilly Sunday evening, and I was experimenting with a recipe my grandmother had loosely described to me over the phone, trying to capture that elusive taste of my childhood. The house filled with that intoxicating scent of baking bread, and when they came out of the oven, golden and glistening with a brush of melted butter, he took one bite and declared, “Okay, these are it.” From that day forward, no holiday meal, no special Sunday dinner, and often, no regular Tuesday night dinner, feels complete without a batch of these rolls gracing our table. They’ve become more than just a side dish; they’re a warm, comforting signal that our kitchen is truly home.
You may also like:
Why You’ll Love This old-fashioned-soft-and-buttery-yeast-rolls
- They deliver an incredibly tender, melt-in-your-mouth texture that makes them irresistible, far surpassing any store-bought alternative.
- The rich, buttery flavor profile is perfectly balanced, making them a delicious accompaniment to almost any meal, from a casual weeknight dinner to a festive holiday spread.
- This recipe is surprisingly approachable for a yeast bread, guiding you to success even if you’re new to baking with yeast, making homemade bread a joyful experience.
- The aroma alone as they bake will fill your home with an intoxicating, comforting scent, signaling that something truly special is coming out of the oven.
- They are incredibly versatile, wonderful served warm with dinner, or even as a simple breakfast treat with a smear of jam.
Behind the Recipe
Crafting these old-fashioned rolls is a truly rewarding experience, and I’ve learned a few things along the way that can make all the difference. The biggest insight is understanding the yeast; it’s a living thing, and giving it the right environment to thrive is crucial. Warm milk, not hot, is key for activation – too hot and you’ll kill it, too cool and it won’t activate properly. Many people trip up by rushing the kneading or the rise times. Kneading develops the gluten, which is what gives the rolls their structure and chew, so don’t skimp on it. And those slow, patient rises? They develop flavor and contribute to that incredibly soft texture. The small touches that elevate these rolls from good to extraordinary are often simple: an extra brush of melted butter right as they come out of the oven for that glossy finish and rich flavor, and allowing them to cool just slightly before tearing into them. It allows the crumb to set properly, ensuring they stay delightfully fluffy.
Shopping Tips
- All-Purpose Flour: Opt for unbleached all-purpose flour for the best flavor and texture. It’s more consistent and generally produces a softer crumb than bleached varieties.
- Active Dry Yeast: Check the expiration date on your yeast! An old or inactive yeast can mean flat, dense rolls. Instant yeast can also be used, but active dry gives a slightly more gradual rise which I appreciate.
- Whole Milk: While you can use lower-fat milk, whole milk contributes to the richness and tender texture of these rolls. It’s worth it for the classic taste.
- Unsalted Butter: Using unsalted butter allows you to control the total amount of salt in your recipe. You’ll want a good quality butter here, as its flavor shines through.
- Granulated Sugar: Any standard granulated sugar will do the trick. It feeds the yeast and adds a touch of sweetness to balance the richness.
- Large Eggs: Ensure your eggs are at room temperature. They incorporate more evenly into the dough and contribute to a richer, softer crumb.
Prep Ahead Ideas
You can absolutely get a head start on these rolls! The dough can be prepared through the first rise, then punched down, shaped into rolls, and refrigerated overnight (up to 24 hours) on your baking sheet. Just make sure to cover them tightly with plastic wrap so they don’t dry out. The next day, pull them from the fridge about 1-2 hours before you plan to bake, allowing them to come to room temperature and complete their second rise.
Time-Saving Tricks
While yeast rolls do require some patience, you can shave a little time off without sacrificing quality. Use a stand mixer with a dough hook for kneading; it cuts down on active time significantly and ensures thorough gluten development. For a quicker rise, you can create a warm, slightly humid environment in your oven by placing a pan of hot water on the bottom rack, then putting your dough in the turned-off oven (with the light on for gentle warmth). Just be sure it’s not too hot.
Common Mistakes
One common pitfall is using milk that’s too hot, which kills the yeast and prevents the dough from rising. Always aim for lukewarm, around 105-115°F (40-46°C). Another mistake is adding too much flour during kneading; this can lead to dry, dense rolls. Resist the urge to keep adding flour, even if the dough seems a bit sticky – a slightly sticky dough often yields a more tender roll. Also, under-proofing or over-proofing can affect the final texture; watch for the dough to double in size for the first rise and become puffy for the second, rather than strictly sticking to a clock.
What to Serve It With
These rolls are the ultimate companion to almost any meal. They’re absolutely divine with a hearty pot roast, a classic roasted chicken, or a comforting bowl of soup or chili. Don’t limit them to dinner, though! They’re fantastic for soaking up gravy, perfect alongside a holiday turkey or ham, and even make a wonderful base for slider sandwiches the next day.
Tips & Mistakes
For that extra golden crust and depth of flavor, consider brushing the rolls with an egg wash (one egg beaten with a tablespoon of water) before baking. If your rolls are browning too quickly on top, you can loosely tent them with foil for the last few minutes of baking. And remember, freshly baked rolls are always best, but a quick warm-up in the oven or microwave will revive them beautifully.
Storage Tips
Store in airtight containers in the fridge. It reheats beautifully, but if you sneak a bite cold straight from the container, it still works.
Variations and Substitutions
While the classic soft and buttery yeast roll is truly perfect as is, you can certainly play around a bit. For a slightly richer roll, you could replace a portion of the milk with heavy cream. If you prefer a hint of whole grain, substitute up to a quarter of the all-purpose flour with white whole wheat flour, though this will result in a slightly denser roll. You could also brush them with garlic butter after baking for a savory twist, but honestly, the simplicity of butter and a touch of salt after baking really highlights their inherent deliciousness.
Frequently Asked Questions
Old-Fashioned Soft and Buttery Yeast Rolls
Ingredients
Main Ingredients
- 4.5 cup all-purpose flour
- 2.25 teaspoon instant yeast one packet
- 0.25 cup granulated sugar
- 1 teaspoon salt
- 1.25 cup whole milk warmed to about 105-115°F
- 0.5 cup warm water about 105-115°F
- 4 tablespoon unsalted butter melted and slightly cooled
- 1 unit large egg room temperature
Instructions
Preparation Steps
- In a large bowl or the bowl of a stand mixer, combine 1 cup of the flour, the instant yeast, sugar, and salt. Stir to mix evenly.
- Warm the milk and water to about 105–115°F. Add the warmed liquids, melted butter, and the egg to the dry ingredients and mix until combined.
- Gradually add the remaining flour, 1/2 cup at a time, mixing until a soft, slightly sticky dough forms. You may not need all the flour.
- Knead the dough on a lightly floured surface for 6–8 minutes by hand or 4–5 minutes in a stand mixer with a dough hook, until smooth and elastic.
- Place the dough in a lightly oiled bowl, cover with plastic wrap or a damp cloth, and let rise in a warm place until doubled in size, about 60–75 minutes.
- Punch the dough down and divide into 12 equal pieces. Shape each piece into a smooth ball and place them in a greased 9x13-inch baking pan, spaced evenly.
- Cover the pan and let the rolls rise again until puffy and nearly doubled, about 30–40 minutes.
- Preheat the oven to 375°F (190°C). Bake the rolls for 12–15 minutes, until golden brown on top.
- Remove from the oven and brush the tops with additional melted butter if desired. Let cool slightly before serving.
Notes
Featured Comments
“New favorite here — so flavorful. comforting was spot on.”
“New favorite here — so flavorful. al dente was spot on.”