
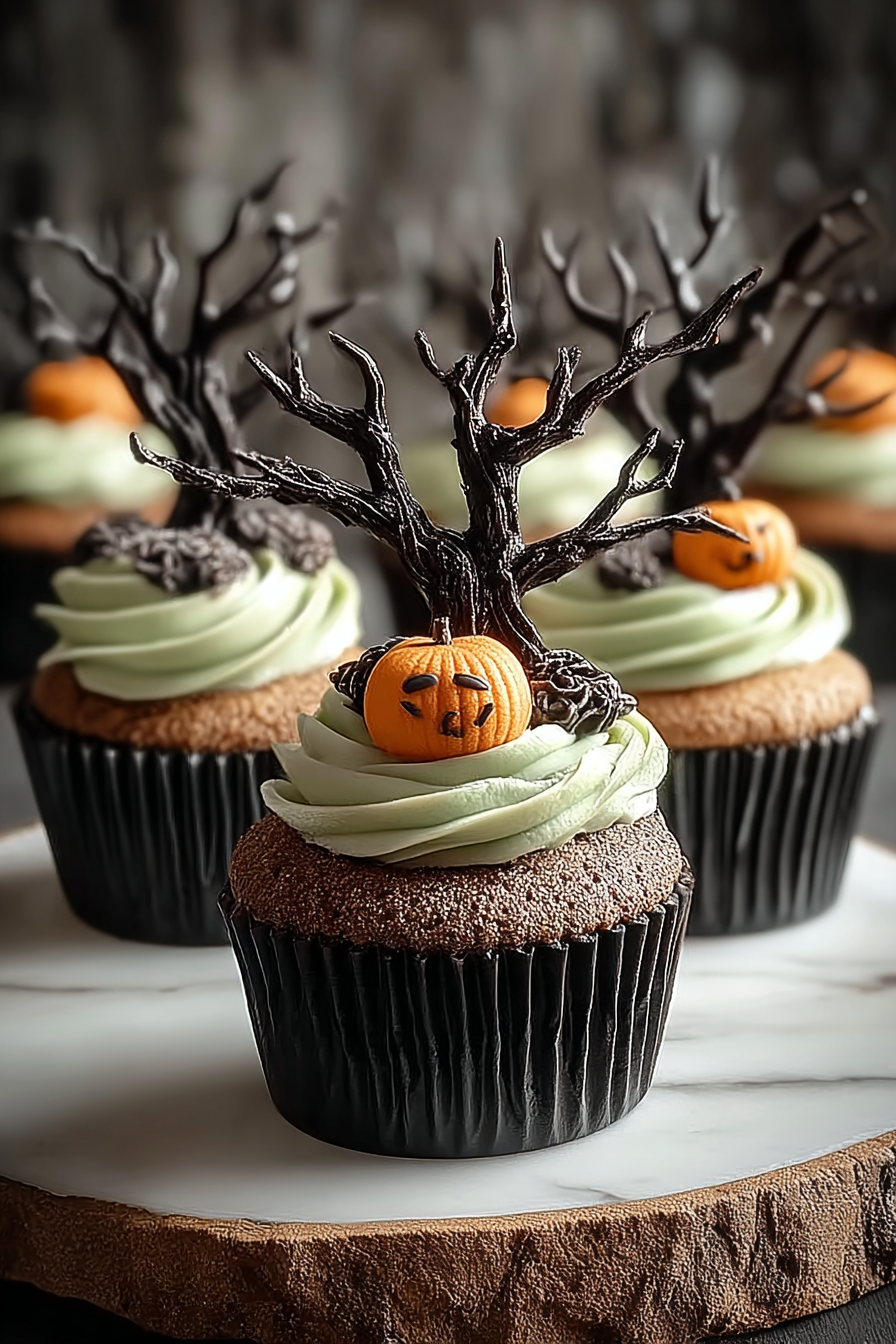
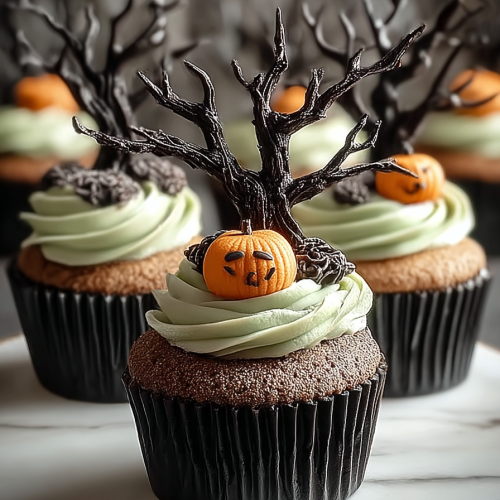
Okay, folks, gather ’round the digital kitchen island, because today we’re diving headfirst into the glorious, slightly unhinged world of Easy Creepy Tree Cupcakes! If you’re anything like me, your Halloween decorating ambitions usually involve pulling last year’s spiderwebs out of a crumpled box and calling it a day. But these little beauties? They look like you *actually* put in effort – the kind of effort that makes other parents wonder if you secretly hired a baker, when in reality, it took you less time than convincing your toddler that, no, you cannot wear a swim diaper *and* a superhero cape to school. They’re spooky without being gross, and honestly, they’re so ridiculously simple, you might just feel like a domestic goddess for a hot minute. And let’s be real, we all need those moments.
My husband, bless his heart, is usually the first taste-tester, which means he’s also often the first victim of my kitchen experiments. When I made these, he walked in, took one look at the slightly wobbly, green-frosted trees, and genuinely asked, “Did you make broccoli cupcakes?” I swear, the man’s got a black belt in sarcasm. The kids, however, were immediately obsessed. My youngest tried to pick a “leaf” off one of the trees and ended up face-planting into the frosting. It looked like a swamp creature had emerged from the bowl, but hey, at least he was happy. We ended up with green frosting on every surface imaginable, including the dog’s tail, but the consensus was clear: these creepy trees were a win. Even if they initially resembled a healthy vegetable.
You may also like:
Why You’ll Love This Easy Creepy Tree Cupcakes
* They’re proof you can be spooky without being a gourmet pastry chef. Seriously, if you can frost a cupcake, you can make a creepy tree. My mantra: “Good enough” is the new “perfect.”
* Kids go absolutely bonkers for them. It’s the perfect treat to bring to a school party or just to make a Tuesday night feel a little bit more like a haunted mansion.
* They look way more impressive than the minimal effort they actually require. People will think you’re a wizard. You’ll just wink and pretend you spent hours crafting each gnarled branch.
* No fancy tools needed! Just a piping bag (or a Ziploc with the corner snipped, because who are we kidding?) and a little green food coloring. And maybe some sprinkles if you’re feeling fancy.
Time-Saving Hacks
– Shortcut that keeps you sane: Grab a box of your favorite plain cake mix and a tub of pre-made vanilla frosting. Nobody needs to know you didn’t whip up everything from scratch. Your secret’s safe with me.
– Hack that saves dishes but still looks like effort: Use a Ziploc bag with the corner snipped off as your piping bag. Less mess, less to wash, and you still get those adorable (or terrifying) little tree shapes.
– The sneaky “cheat” you always pull when you’re in a rush: Edible glitter or Halloween sprinkles are your best friend. They instantly elevate a “meh” cupcake to “wow!” status without any actual skill required.
Kitchen Confessions
– The disaster story: My first attempt at the “tree” frosting was a bit too warm, so after piping, they slowly started to lean and then completely melted into sad, green puddles on top of the cupcakes. They looked less like creepy trees and more like a swamp monster threw up. Still tasted good, though!
– A silly mistake you or your family made with this recipe: My son, convinced the trees were made of actual bark (because, you know, “creepy trees”), tried to pick off a piece and then decided to *gnaw* on the paper liner. He’s fine, mostly.
– Honest admission: the messy part you secretly skip: Honestly? Wiping down the counter *immediately* after I’m done frosting. I usually let it sit for about 30 minutes, tell myself I’ll get to it, then inevitably discover dried frosting spots an hour later. C’est la vie.
What to Serve It With
Honestly, these are a whole vibe on their own. But if you’re feeling extra, a glass of cold milk (to cut through all that sugar, obviously) or a spooky punch (the kind with gummy worms floating in it, because why not?) would be perfect.
Tips & Mistakes
Tip: Make sure your cupcakes are completely cooled before frosting. Trying to frost warm cupcakes is like trying to ice skate uphill—it’s just a gooey, frustrating mess.
Tip: If your frosting feels too soft to hold a tree shape, pop it in the fridge for 10-15 minutes to firm up a bit.
Mistake: Don’t over-mix your cupcake batter! It makes them tough. Mix just until combined, even if there are a few lumps. Lumps are character, people!
Tip: Don’t be afraid to experiment with your “tree” shape. Some can be tall and spindly, others short and squat. Nature isn’t perfect, and neither are your cupcakes!
Storage Tips
Keep it in the fridge… assuming there’s anything left. Midnight cold bites? Honestly better than fresh.
Variations and Substitutions
Swap whatever—honey ↔ sugar, tamari ↔ soy sauce—or skip a step and call it rustic. Still edible. For these trees, swap out green for purple or black frosting for an even spookier vibe. Instead of just plain sprinkles, add tiny candy bats, gummy worms, or crushed oreos for “dirt” around the base of the trees. Or skip the fancy stuff and just use green frosting—it’s still awesome.
Frequently Asked Questions
Easy Creepy Tree Cupcakes
Ingredients
Cupcake Ingredients
- 1.5 cups all-purpose flour
- 1 cup sugar
- 0.5 cups unsweetened cocoa powder
- 1 tsp baking powder
- 0.5 tsp baking soda
- 0.5 tsp salt
- 1 cup milk use whole for creaminess
- 0.5 cups vegetable oil
- 2 large eggs
- 2 tsp vanilla extract
Frosting Ingredients
- 1 cup unsalted butter softened
- 3 cups powdered sugar
- 0.5 cups cocoa powder
- 2 tbsp milk more if needed
- 1 tsp vanilla extract
Instructions
Baking the Cupcakes
- Preheat your oven to 350°F (175°C) and line a cupcake tin with liners.
- In a mixing bowl, whisk together flour, sugar, cocoa, baking powder, baking soda, and salt.
- In another bowl, combine milk, oil, eggs, and vanilla. Mix well.
- Pour the wet ingredients into the dry ingredients and stir until just combined.
- Fill each cupcake liner about two-thirds full with batter.
- Bake for 18-20 minutes or until a toothpick comes out clean.
- Let the cupcakes cool completely before frosting.
Making the Frosting
- Beat softened butter until creamy. Gradually add powdered sugar and cocoa.
- Add milk and vanilla, mixing until smooth and fluffy.
- Frost the cooled cupcakes generously. Create a tree shape with the frosting.
Notes
Nutrition
Featured Comments
“Made this last night and it was so flavorful. Loved how the hearty came together.”
“Impressed! Clear steps and absolutely loved results. Perfect for busy nights.”